How to Create a Product Charge
- From the Dashboard: Click the “Warehouse Operations” tab, click the “Accounting” App, then click the “Product Charges” Table.
- From the Quick Actions shortcut: Press a dot (period) on your keyboard, then select “Product Charges” Table from the list of Quick Actions.
Note: This table is used for record keeping purposes only and does not affect/sync to other data or tables on your site.
-
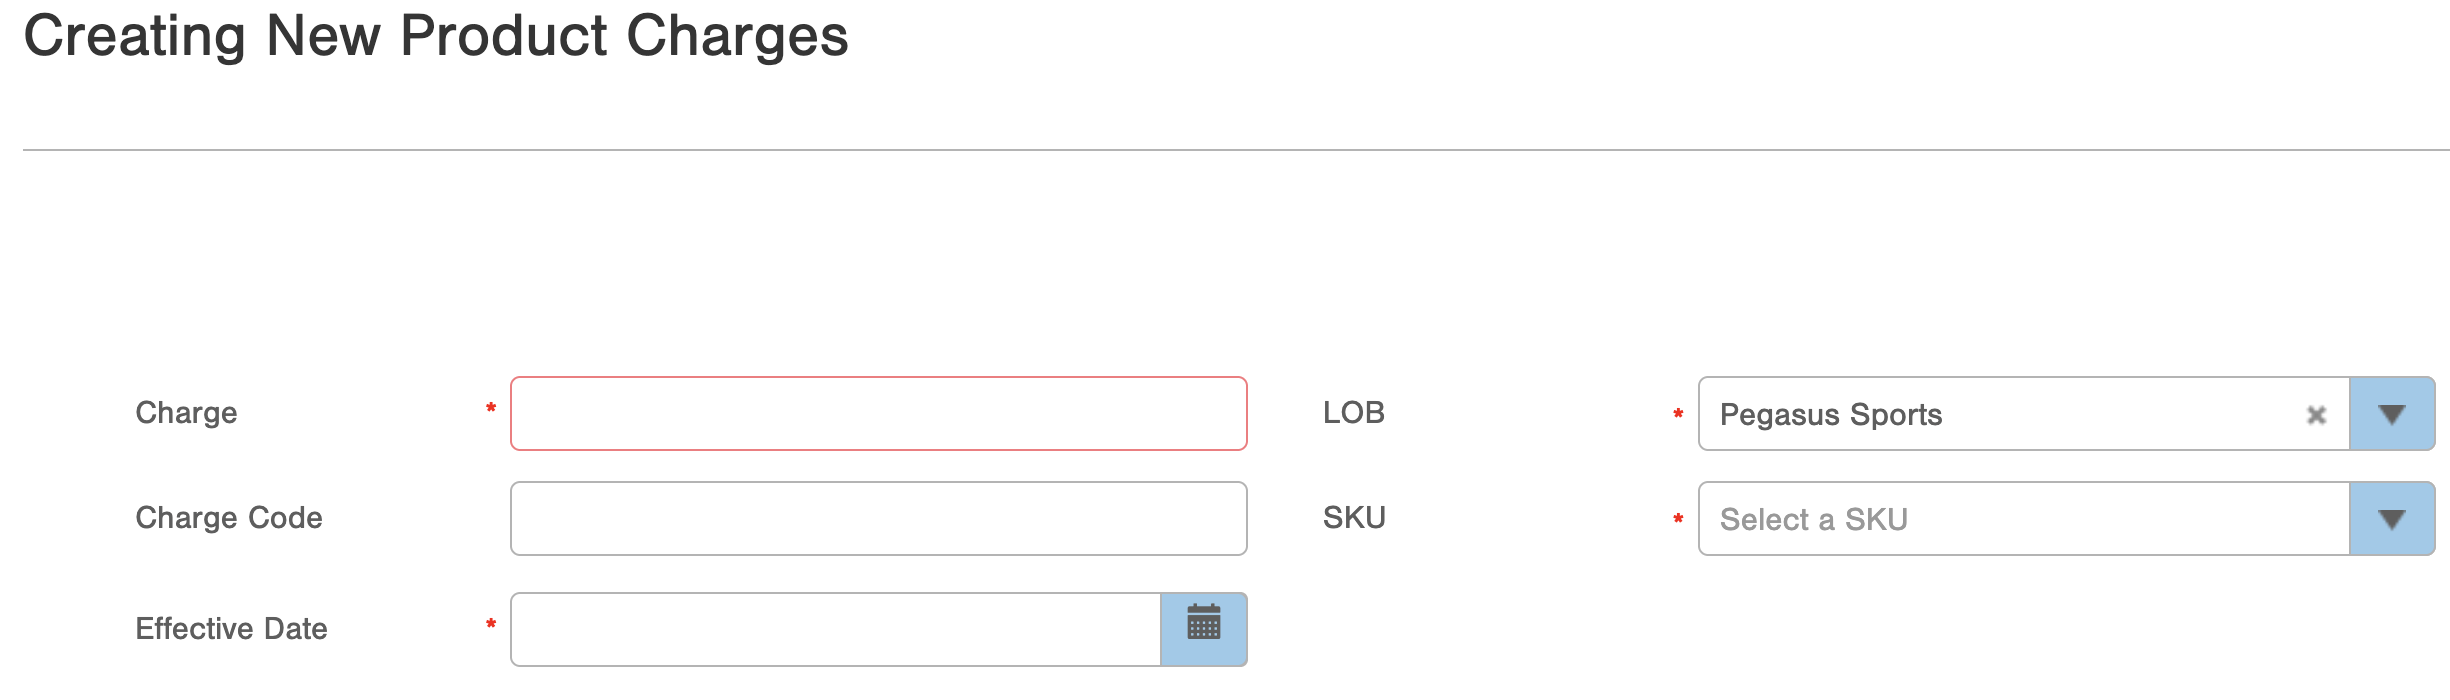
LOB (Required): The Line of Business where this charge will apply.
-
SKU (Required): The specific item the charge applies to.
-
Charge (Required): The monetary value associated with the charge. Note a negative charge will display in. for example, a charge of -1 dollars will display as “$(1.00)”.
-
Effective Date (Required): The date the charge will be in effect.
-
Charge Code (Optional): Short code/description of what the charge is for.
Common Errors:
Edit and Delete Product Charge Records
Using Bulk Actions for Product Charges
Bulk Load Product Charges
Bulk Edit Product Charges
- Effective Date
- Charge
- LOB
- Charge Code
Bulk Edit Notes:
- When performing a Bulk Edit on the Charge field, entering a negative number is possible and results in the charge being displayed in parenthesis (e.g., "$(1.00)").
- During bulk editing, the SKU field is intentionally not available to edit.
- If you use special characters or accented letters in the Charge Code field during bulk editing, the system will replace them with non-accented letters.
API Access
You can manage Product Charge records using via the InfoPlus API endpoint, /productCharges. You are able to GET, POST, PUT, and DELETE Product Charge records via this endpoint. For more details please see the Overview of the InfoPlus API knowledge base article.