The Ship Parcel Order Desktop App is used by administrators to specify shipping details (when needed) and to ship orders in Infoplus.
NOTE: The Shipping Station Mobile Floor App can also be used. The Mobile App is a quick way for warehouse personnel to ship an order in Infoplus at the point when parcels are ready to leave the warehouse.
The 'Ship Parcel Order" process can only be performed on one order at a time. Once the process is complete, the order will be in a status of "Shipped.".
If an order is to be shipped using a non-parcel carrier, such as LTL (Less than Truckload), TL (a full truckload), Will Call (where the recipient comes to the warehouse to receive the item), local courier, etc., use the Ship a Non-Parcel Order process. For clarification, here are examples of parcel carriers: UPS, FedEx, DHL, USPS, etc. Use the standard process to ship a parcel order when using parcel carriers.
NOTE: If you need to add a carton to an order that already shipped, do not use this process. See Add a Carton to a Shipped Order.
Ship a Parcel Order
- Access the “Order” Table. Two methods:
- From the Dashboard: Click the “Warehouse Operations” tab, click the “Fulfillment” App, then click the “Order” Table.
- From the Quick Actions shortcut: Press a dot (period) on your keyboard, then select “Order” from the list of Quick Actions.
NOTE: You can also access this process directly by pressing the dot (.) on your keyboard and selecting "Ship Parcel Order" from the list of Quick Actions. You will be taken to the "Order" table to select the order. A Next button will display to continue through the process starting from Step 4 below. - Either click the checkbox next to the order you want to ship or click on the Order to open it.
- Click the Action button and select Ship Parcel Order. The Ship Parcel Order process screen will appear. The first step of the process is "Select Carrier."
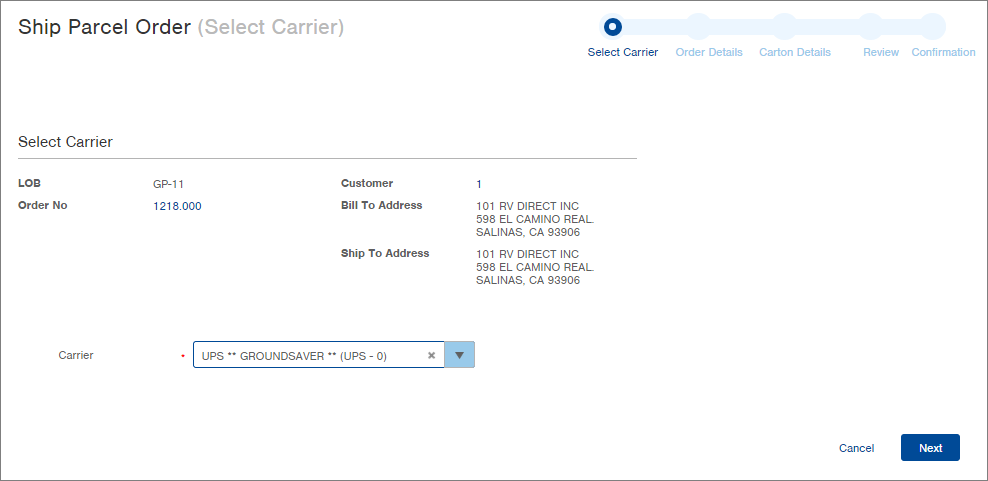
- In the Select Carrier step of the process, verify or modify the Carrier.
- Click Next. The Order Details step of the process will display.

- Verify or modify the Ship Date.
- In the Shipment Accessories section of the window, click Add to add shipment accessories (i.e., Adult signature, Hold for pickup, etc.). Accessories can impact what gets printed on the parcel label, the amount that is paid for the shipment (to the carrier), and the carrier's behavior.
NOTE: Depending upon the order, one or more shipment accessories may automatically display in this section (i.e., alcohol orders should have the "Alcohol-Adult Signature" accessory already selected). The Add Shipment Accessory window will display.

The Value field is to be used when an accessory requires it (i.e., Cash on Delivery). When a value is required, the Value field will display a red asterisk. - Select an accessory and click OK.
NOTE: If you want to add more than one accessory, you can check the "Add another" checkbox, then click OK. Another "Add Shipment Accessory" window will appear for you to add another accessory. When you are finished adding accessories, remove the "Add another" selection and click OK. - Selected accessories will display in the Shipment Accessories window. If you want to edit or delete an accessory, click the
 icon at the end of the accessory's row.
 - Click Next. The Carton Details step of the process will display.

- Add Cartons to the shipment by clicking the Add link in the Cartons section. The Add Carton window will display.

- Enter the Weight, Length, Width, and Height of the Carton to be used. If you want to add multiple cartons, check the "Add another" checkbox, then click OK. When you are finished adding cartons, remove the "Add another" selection and click OK. The carton(s) will display in the Cartons section of the window.
- For each carton added, you can add an Accessory (i.e., Additional Handling, COD Standard, etc.). To do this, click the zero (0) that appears in the Accessories column for the carton you want to add the accessory too. Click Add Accessory from the drop-down menu. Select an accessory and click OK. Continue to add accessories to cartons as needed.
NOTE: If you want to edit or delete a carton, click the icon at the end of the carton's row.
 - Click Next. The Review step of the process will display.
- Review the shipment details, and when you are ready to ship the order, click Submit.
- The Order will be shipped. Review the results.
NOTE: The order will now have a status of "Shipped." You can track the shipment in the Parcel Shipment table. You can also Unship a Parcel Order if needed. - To return to the "Order" table, click the Return to Order link.
A Quick Note on Phone Numbers that Appear on Parcel Labels