If you use ChannelAdvisor as part of your eCommerce strategy, you can integrate the system with Infoplus to share order, shipment, and inventory details. This integration allows you to list your products and fulfill orders from some of the Internet’s most popular marketplaces, with Infoplus serving as the hub for order management and shipping.
Contact Infoplus Support to complete the first stage of the integration. Afterward, you will be able to connect Infoplus to each ChannelAdvisor Marketplace as described below.
Here’s what happens after connecting Infoplus to ChannelAdvisor
Information is synchronized between Infoplus and ChannelAdvisor every fifteen minutes:
- Orders are pulled from ChannelAdvisor into Infoplus so that they can be fulfilled right away.
- Shipments are pushed from Infoplus to ChannelAdvisor as your warehouse ships its orders, giving your customers real-time visibility.
- Inventory levels are shared with ChannelAdvisor, helping to avoid backorders.
Connect Infoplus to Your ChannelAdvisor Marketplaces
If you are integrating ChannelAdvisor with Infoplus for the first time, contact Infoplus Support before completing these steps.
Step 1: Determine Your ChannelAdvisor ProfileID
- Open your ChannelAdvisor site and access the account to be used with Infoplus.
- Click on My Account > Company Setup.
- Copy and save the Profile ID, which you will enter in a later step.
Step 2: Determine ChannelAdvisor’s Site Name for the Marketplace of Interest
- Within ChannelAdvisor, click on Sales > Orders. The list of Orders appears.
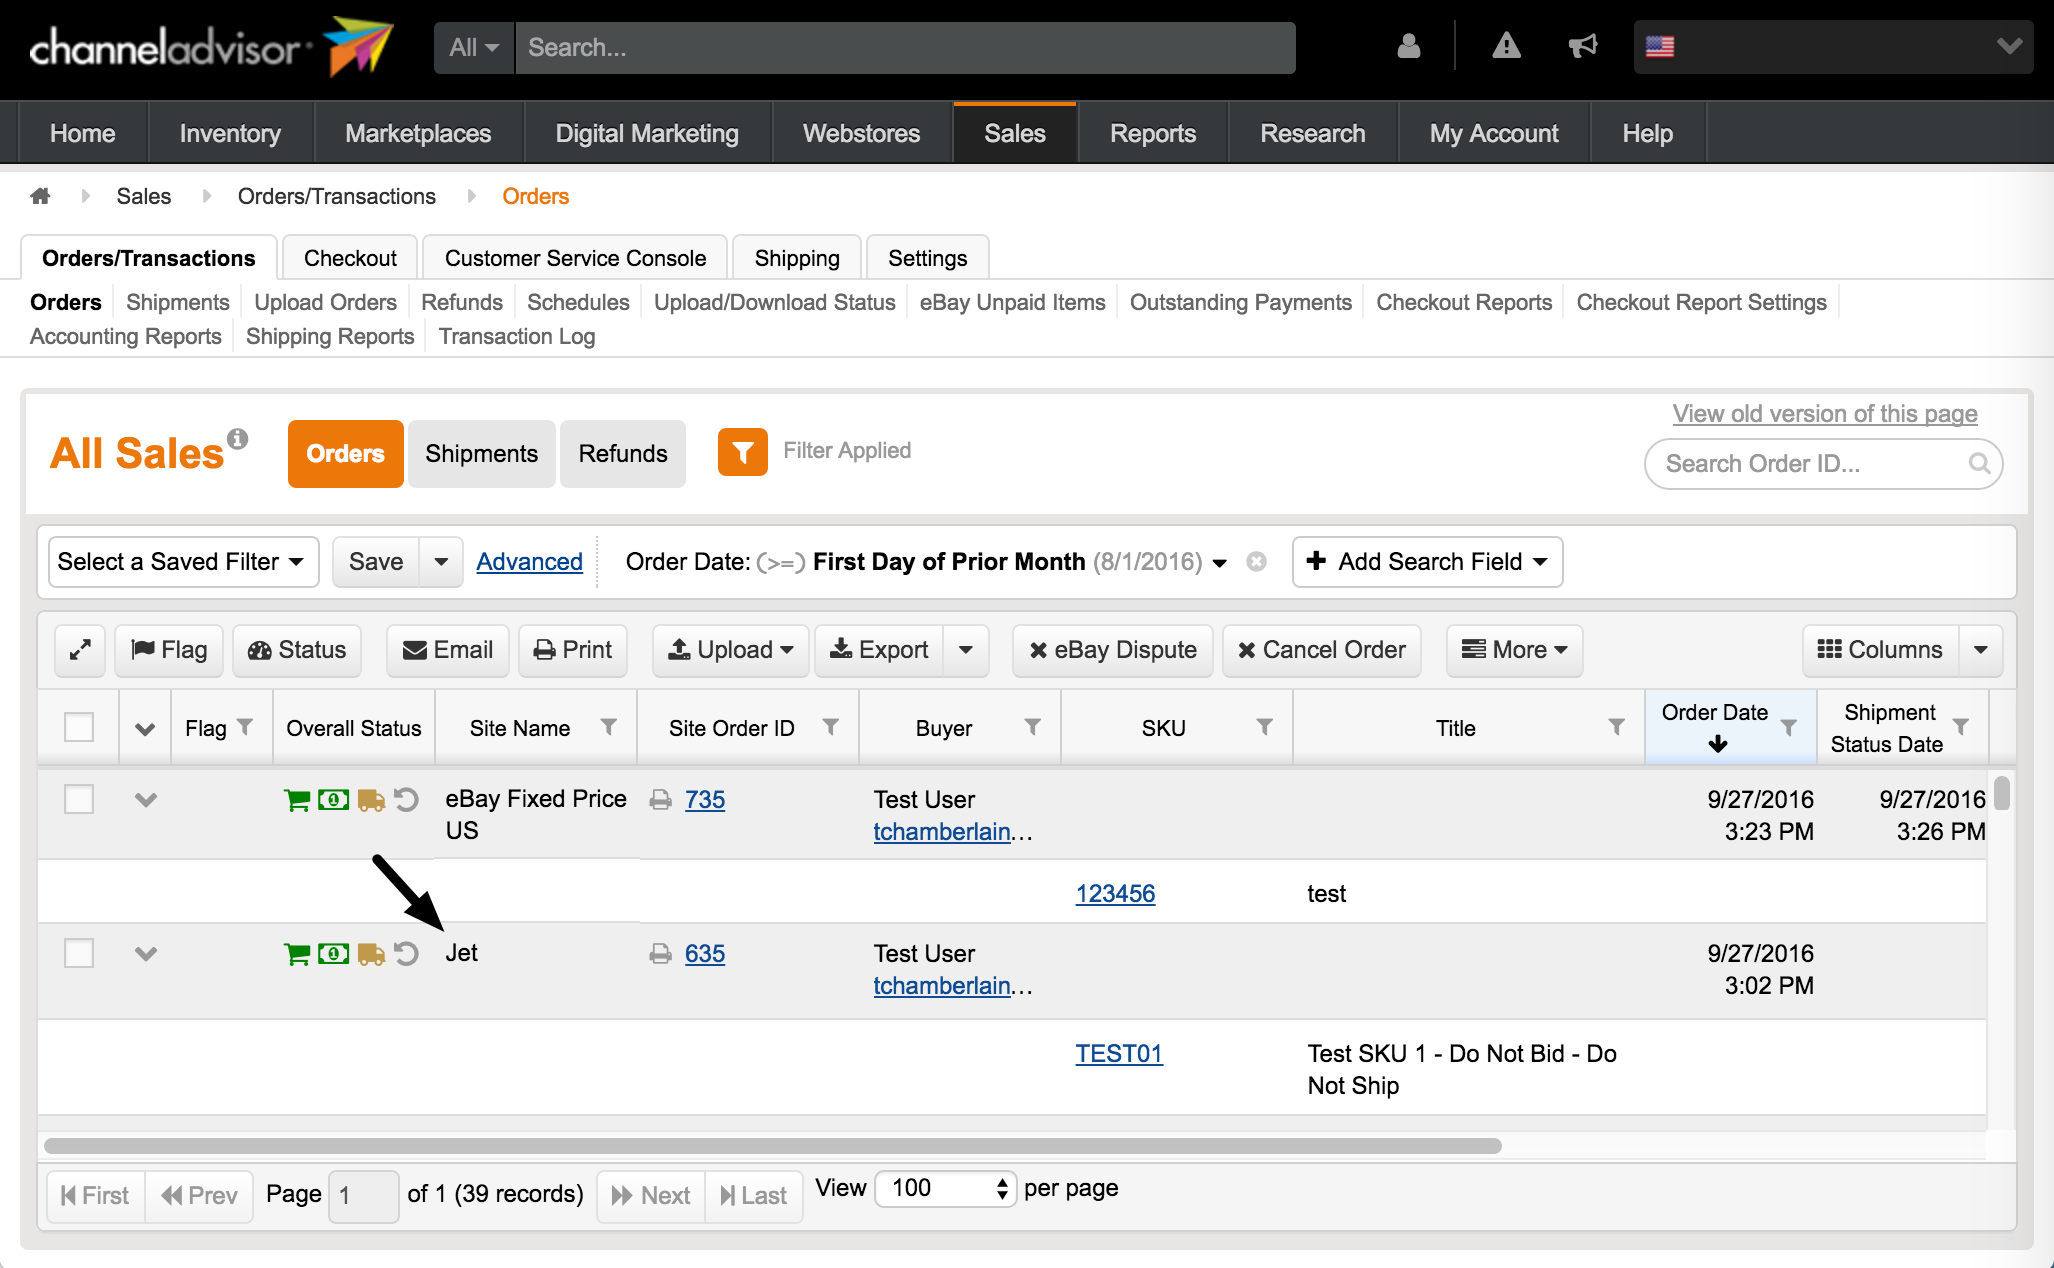
- Copy and save the Site Name from a row that shows the ChannelAdvisor marketplace of interest, which you will enter in a later step.
Step 3: Create an Infoplus Shopping Cart Connection for ChannelAdvisor
- In Infoplus, go to the Shopping Cart Connection table. Two ways:
- From the Dashboard: Click the “Account Management” tab, click the “Shopping Cart” App, then click the “Shopping Cart Connection” Table.
- From the Quick Actions shortcut: Press a dot (period) on your keyboard, then select “Shopping Cart Connection” from the list of Quick Actions. -
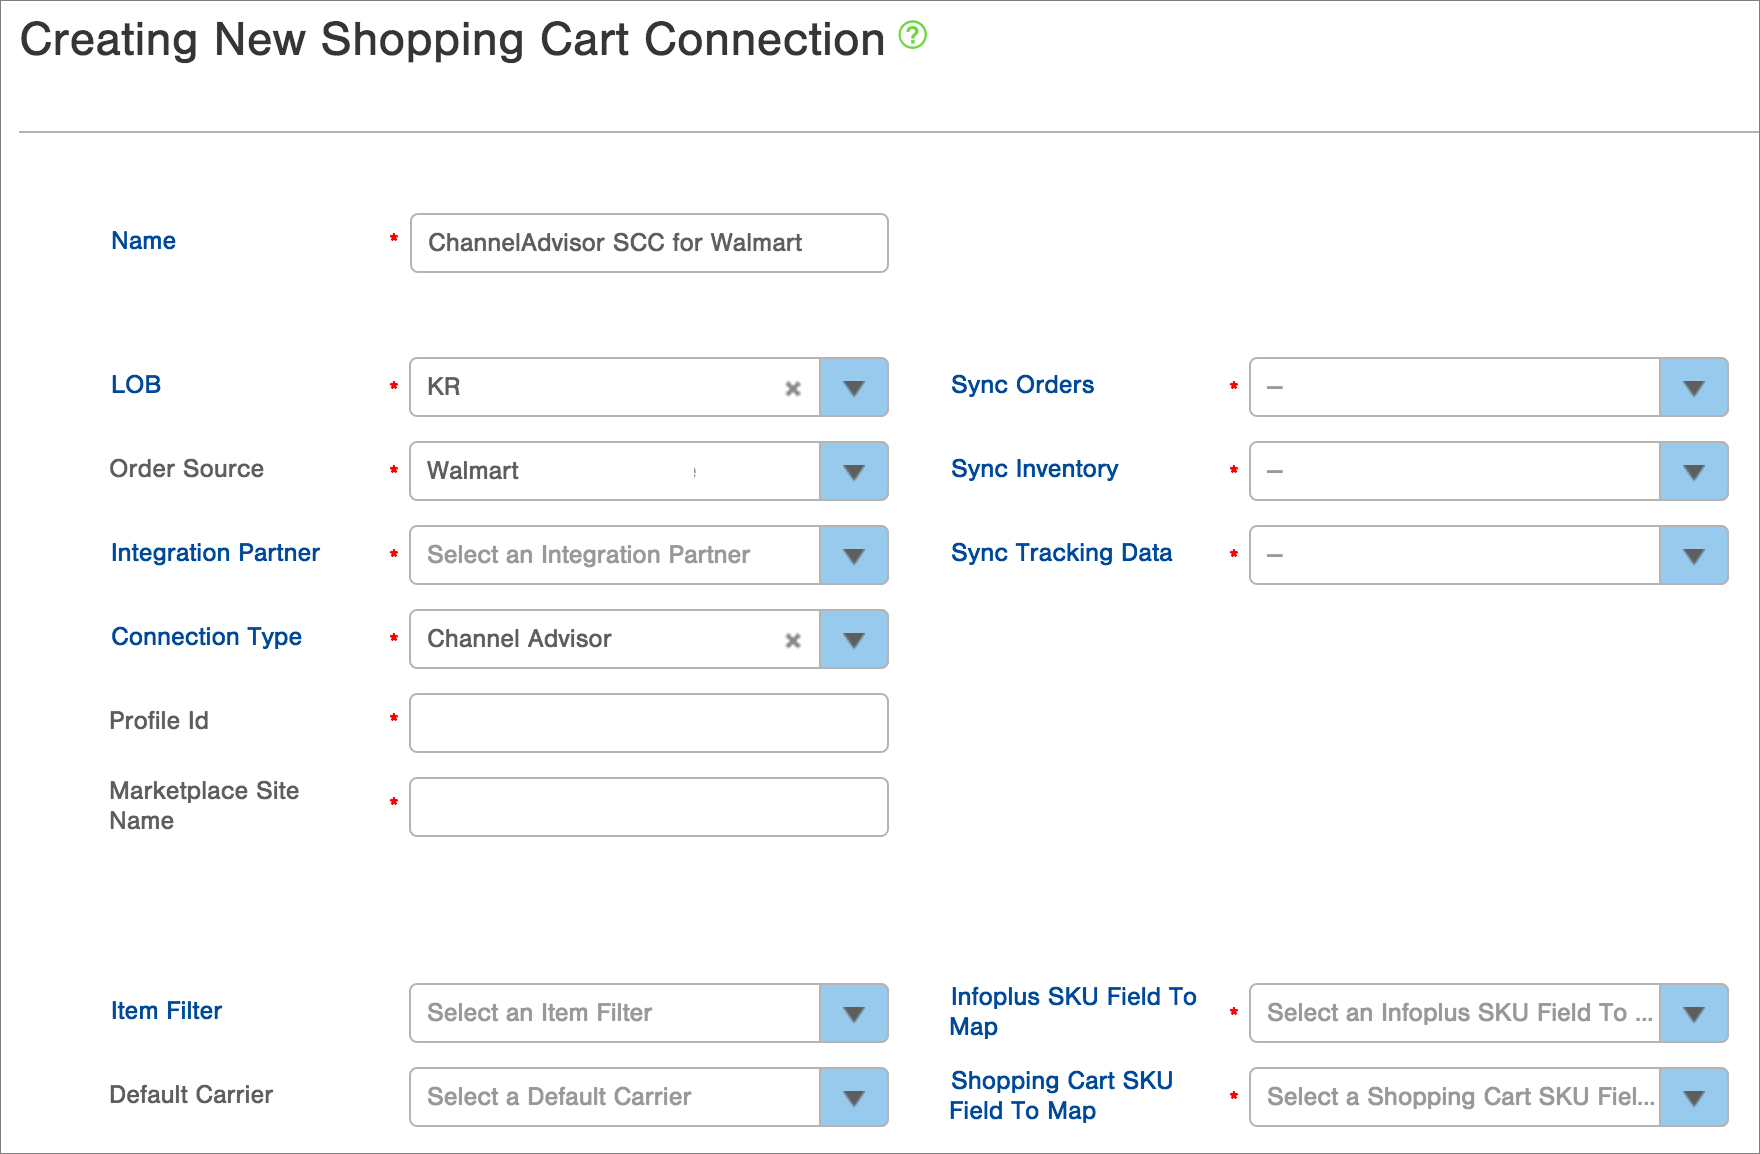
Click the Create New button. The Creating New Shopping Cart Connection window appears.
-
Type a Name for the Shopping Cart connection (e.g. ChannelAdvisor SCC for Walmart).
-
In the LOB field, select the Line of Business associated with the shopping cart.
- Select the Order Source that corresponds to the ChannelAdvisor Marketplace for this Shopping Cart connection (e.g. Walmart, Amazon). Selecting an Order Source for ChannelAdvisor orders lets you locate records and perform other actions in Infoplus (e.g., create metrics associated with the Order Source).
- Select the Integration Partner for this shopping cart connection (e.g. SPS Commerce). If there is no Integration Partner, select "Not Specified."
- In the Connection Type field, select "Channel Advisor." New fields for ProfileID and Marketplace Site Name will appear.
- Enter the ChannelAdvisor ProfileID that you saved above.
- Enter the Marketplace Site Name from ChannelAdvisor that you saved above.
- In the Sync Orders field, select whether you want Orders that are placed in ChannelAdvisor to be synchronized with Infoplus. By selecting "True", when orders are created in ChannelAdvisor, an order will automatically be created in Infoplus.
- In the Sync Inventory field, select whether you want the Inventory levels to be pushed from Infoplus to ChannelAdvisor. Selecting "True" tells Infoplus to communicate inventory levels to ChannelAdvisor. Once synchronized, quantities of selected items will match.
- In the Sync Tracking Data field, select whether you want shipment Tracking Data to be pushed from Infoplus to ChannelAdvisor. Selecting "True" turns synchronization on. For example, you may want to send tracking data if you use ChannelAdvisor to email shipment confirmations.
- The Item Filter field is optional. If you have a specific set of items that Infoplus should consider when pushing inventory levels to ChannelAdvisor, create a filter in the Item table, and then select the Filter here. If all items are to be considered, leave the field blank.
- Select a Default Carrier for shipping ChannelAdvisor orders from this marketplace (optional).
- In the Infoplus SKU Field to MAP and Shopping Cart SKU Field to Map fields, select the product identifiers that should be used to match products between Infoplus and ChannelAdvisor. For example, if both Infoplus and ChannelAdvisor use a field called "SKU" to identify the product, set both fields to SKU. If different product identifiers are used, such as Vendor SKU or UPC, select that as the SKU field.
- NOTE: Infoplus offers custom fields. To request a new field for use in the Infoplus SKU Field to MAP list, contact Infoplus Support. - Click Save. The record will be saved and a message will appear at the top of the screen indicating the connection was made successfully.

Step 4: Test the Integration
- Place test orders in your ChannelAdvisor marketplace.
-
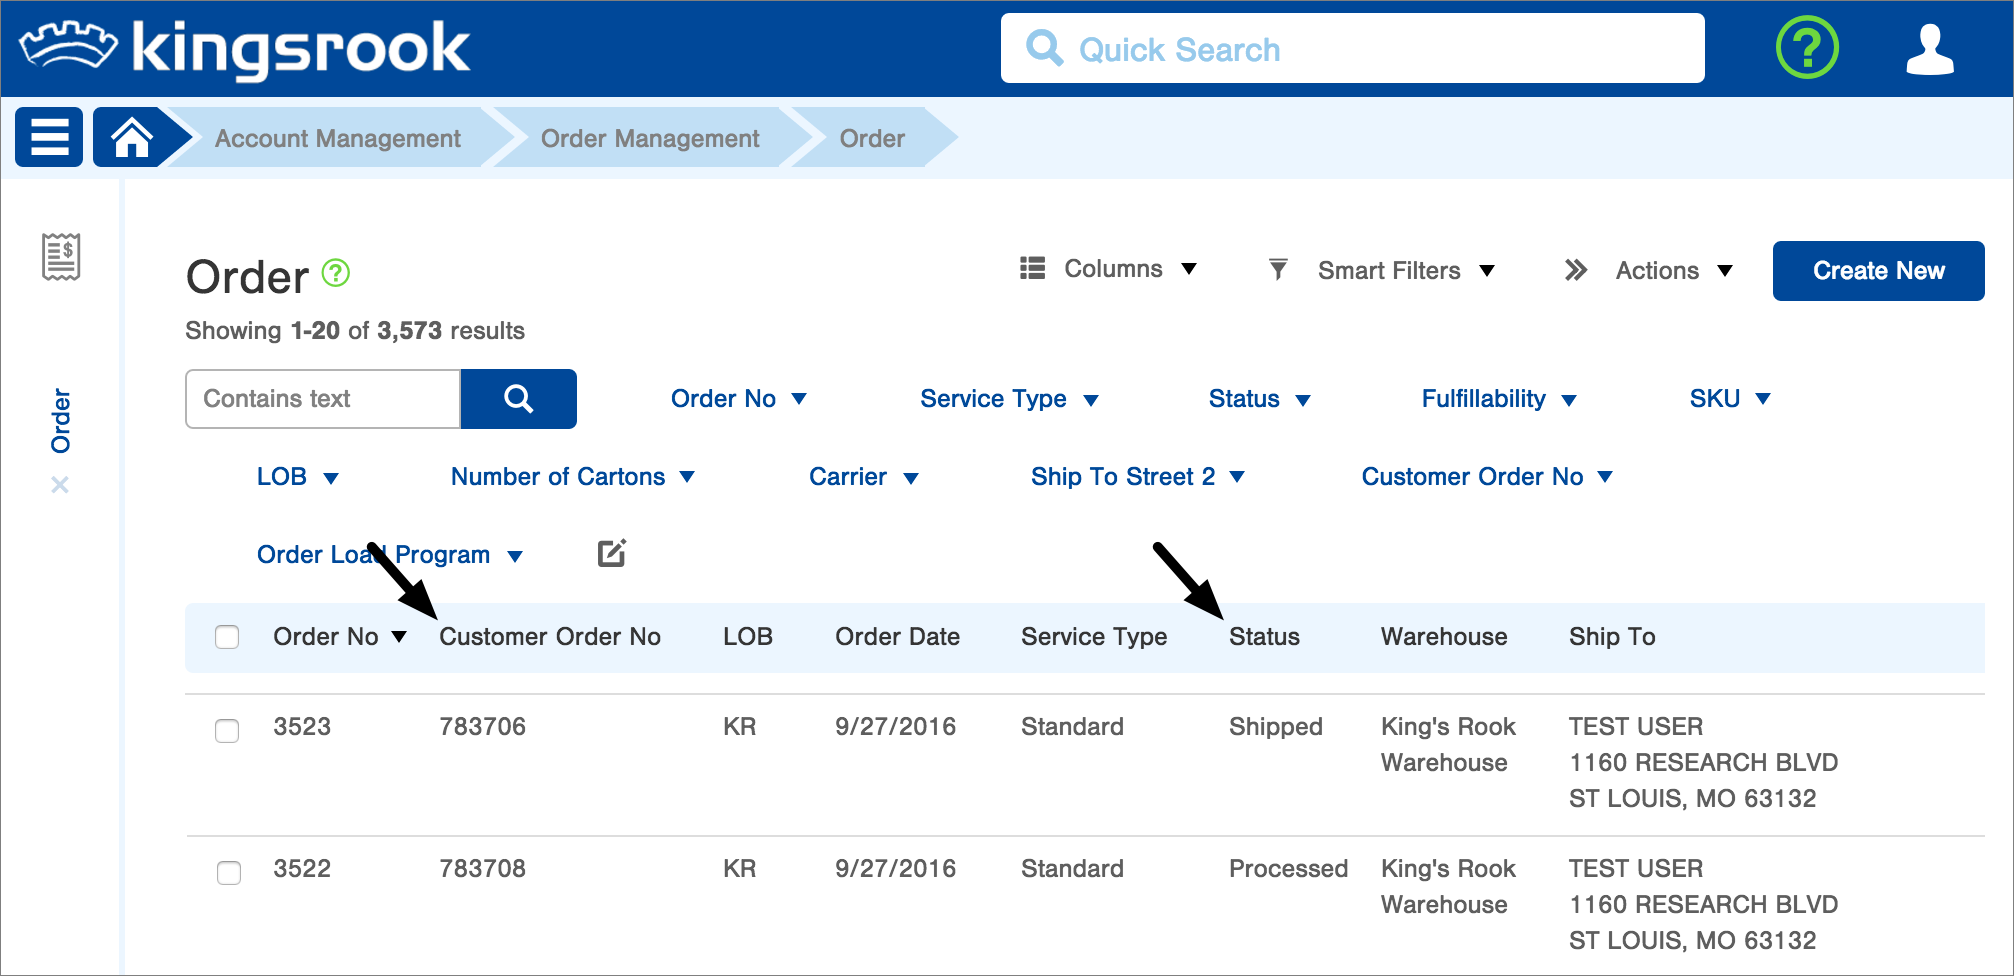
View Orders in Infoplus to confirm that orders are being pulled from ChannelAdvisor into Infoplus.
NOTE: Information is synchronized between Infoplus and ChannelAdvisor every fifteen minutes. If your orders do not appear immediately, check again fifteen minutes after placing the order.
-
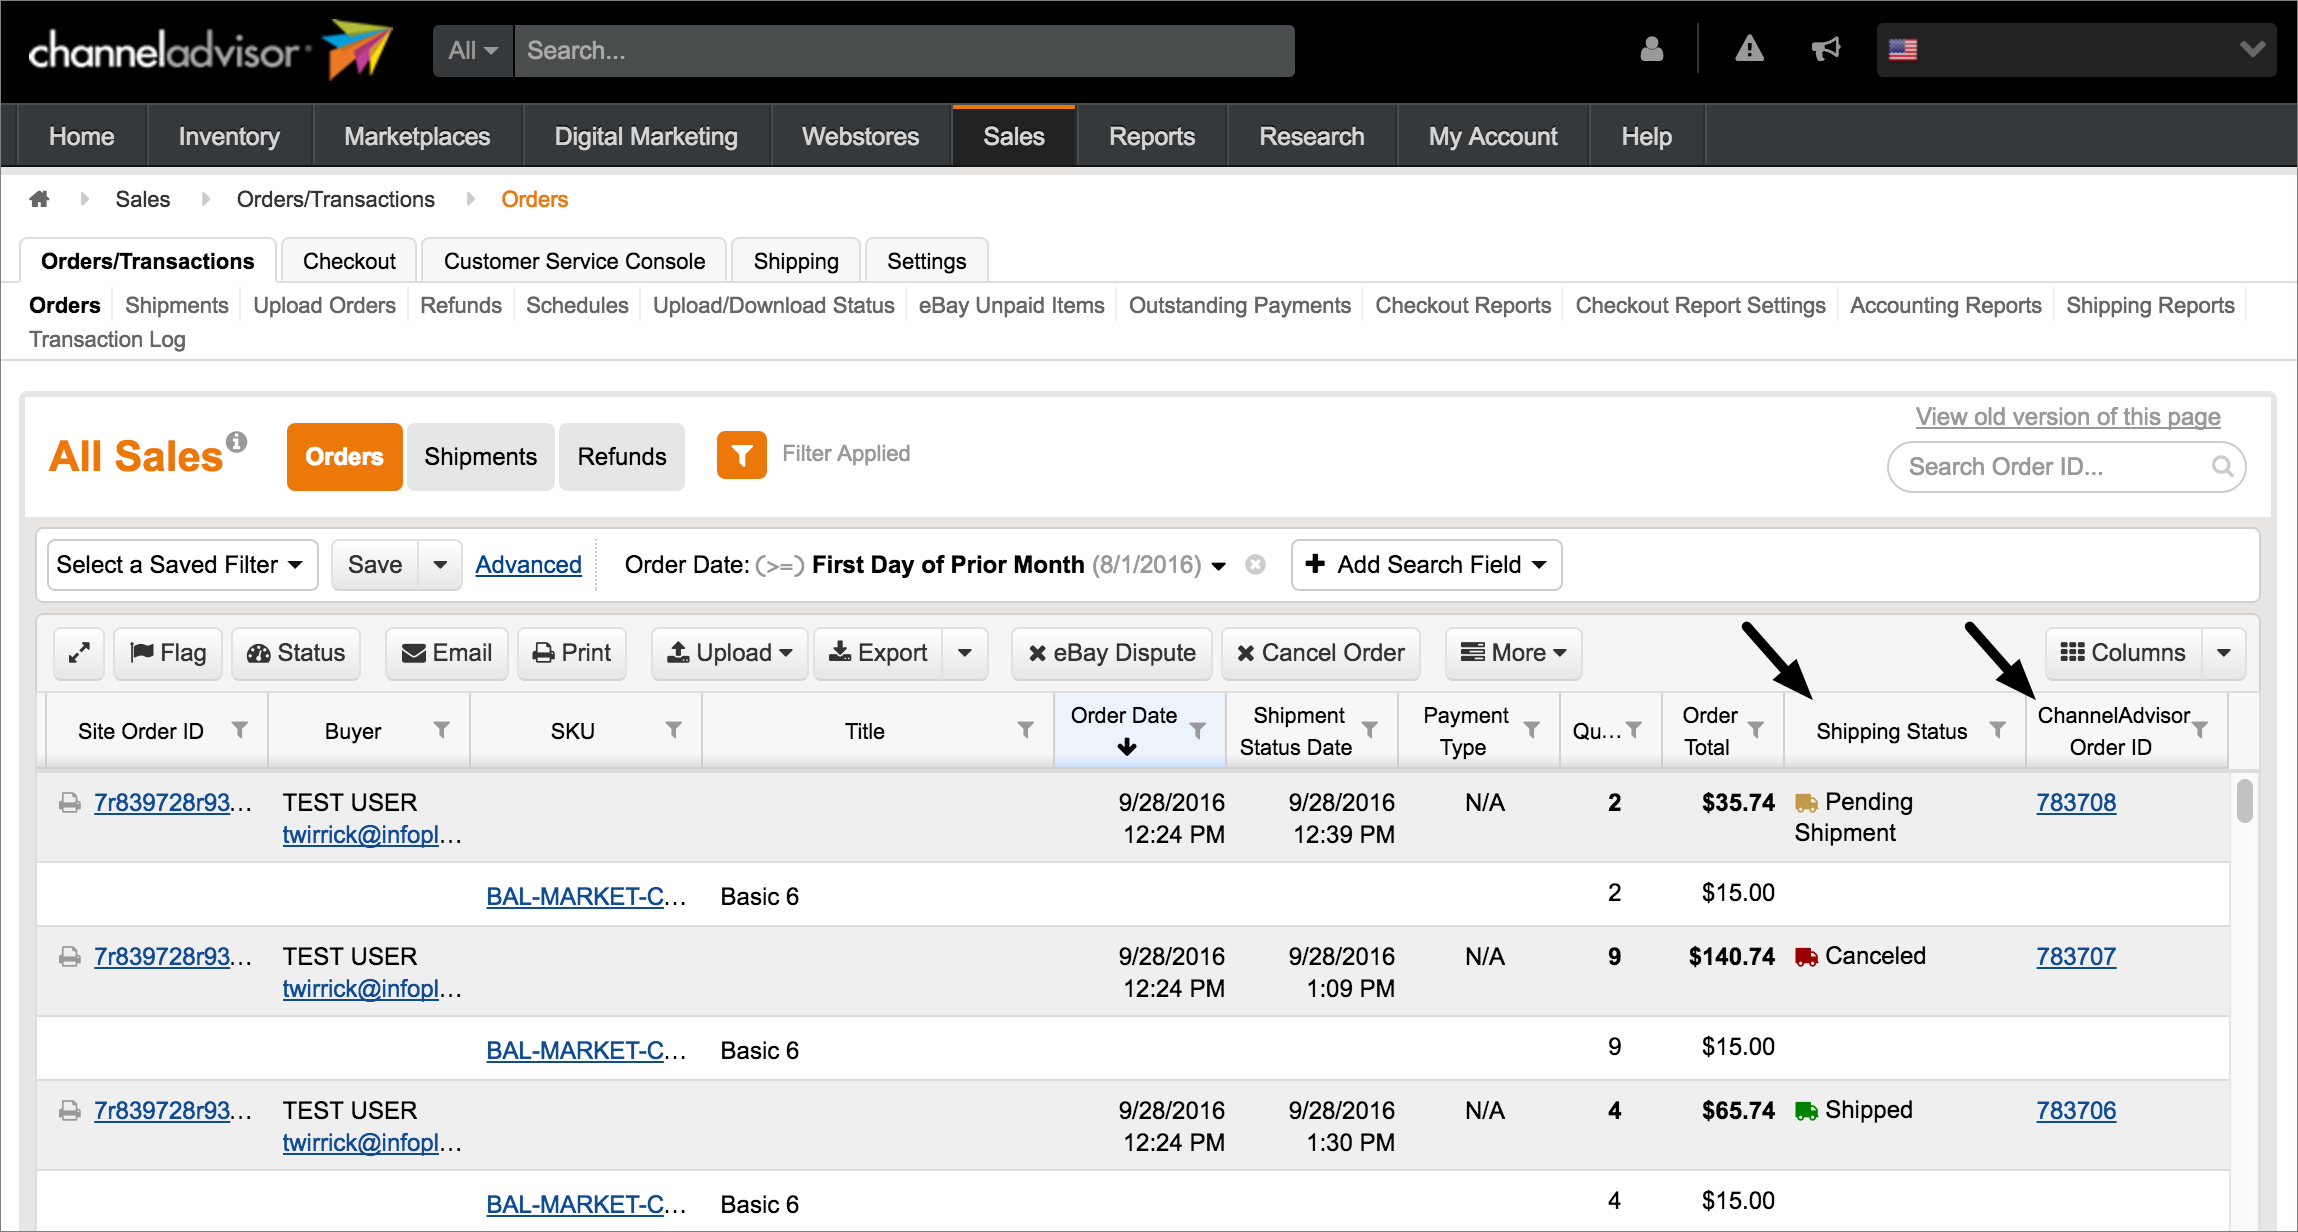
Within ChannelAdvisor, click on Sales > Orders. The list of Orders appears.
-
You will be able to compare the following information on the two sites as shown above:
- The Customer Order No in Infoplus matches the ChannelAdvisor Order ID in ChannelAdvisor.
- The Status in Infoplus provides information about the Shipping Status in ChannelAdvisor.
- If the Infoplus Status is “Shipped”, the ChannelAdvisor Shipping Status is “Shipped”.
- If the Infoplus Status is “On Order”, the ChannelAdvisor Shipping Status is “Unshipped”.
- A Shipping Status of “Pending Shipment” in ChannelAdvisor indicates that Infoplus has received the order. The Infoplus Order table will show the current Status of such orders.
- ChannelAdvisor orders with a Shipping Status of “Canceled” may not appear in the Infoplus Order table. -
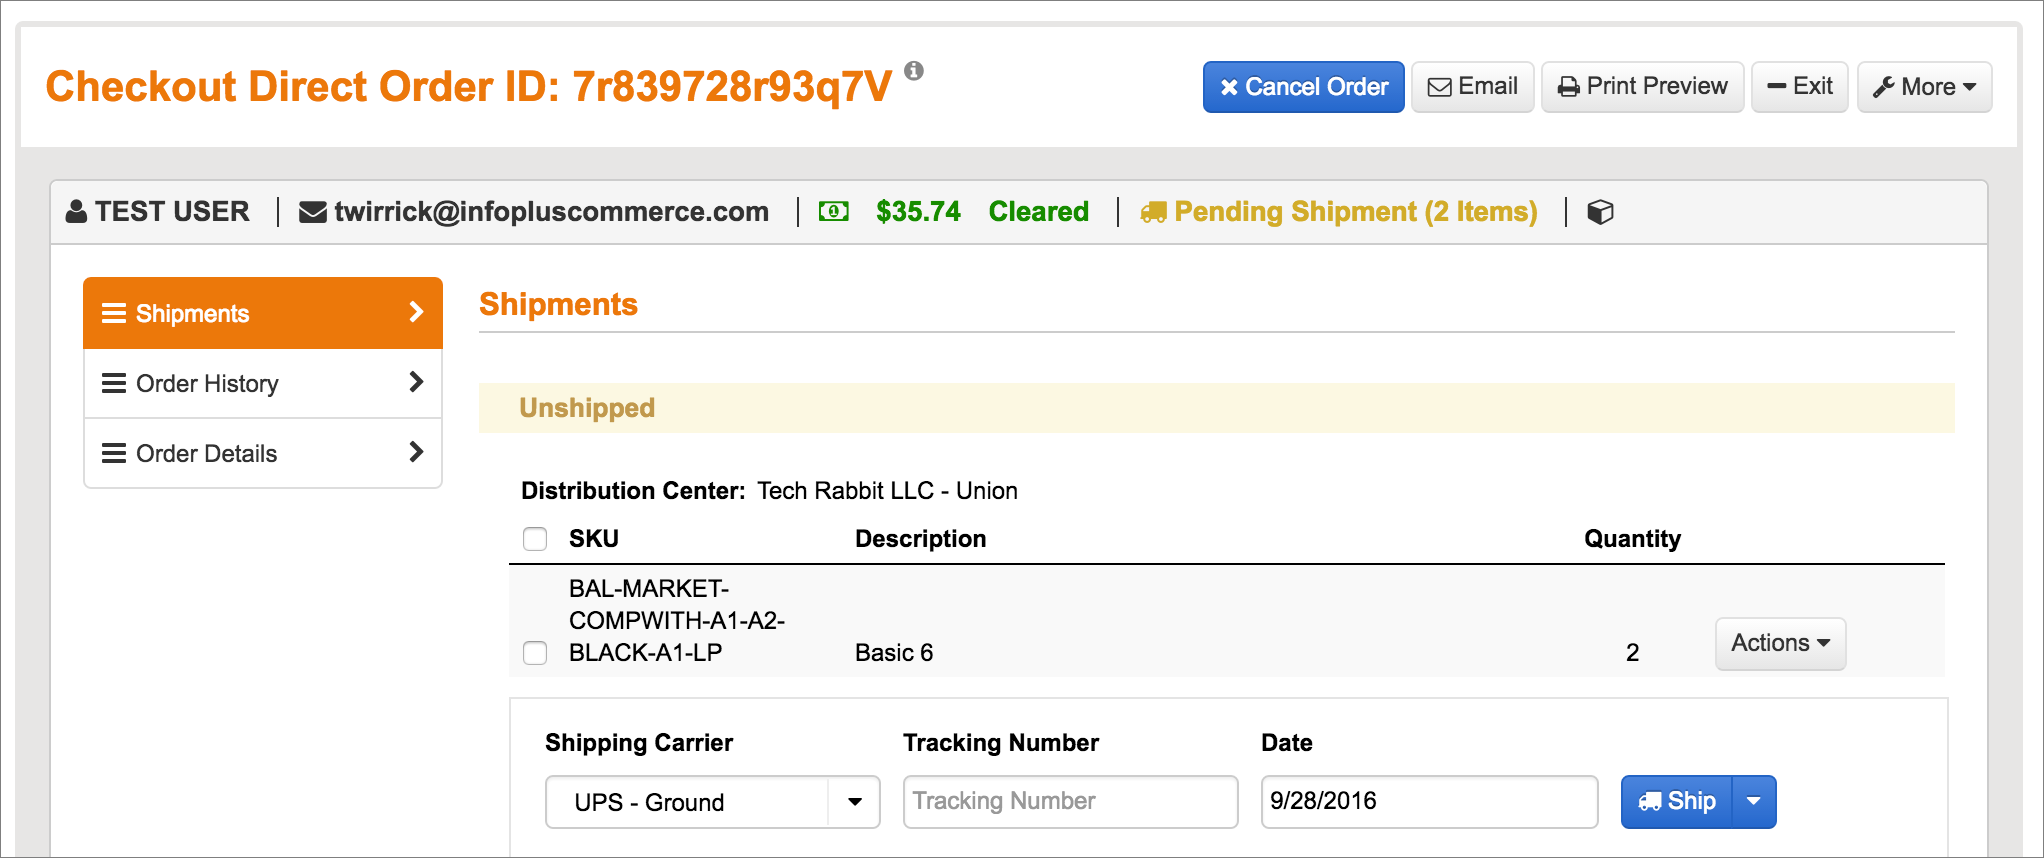
To see shipping details in ChannelAdvisor, click on the Site Order ID or the ChannelAdvisor Order ID. A screen showing order information appears.
NOTE: The Tracking Number is visible for shipments with a status of “Shipped”. If the status is “Pending Shipment”, the Tracking Number field will be empty. Examples of orders with each status are shown below.
-
View Items in Infoplus to see the Item table.
-
Search the Item table for a SKU shown in ChannelAdvisor.
-
Click on the row containing the SKU of interest. The Viewing Item screen appears.

-
Within ChannelAdvisor, click on Inventory > All Products. The list of Products appears.
- NOTE: If the SKU of interest is not visible, use the Search for the function to locate it.
-
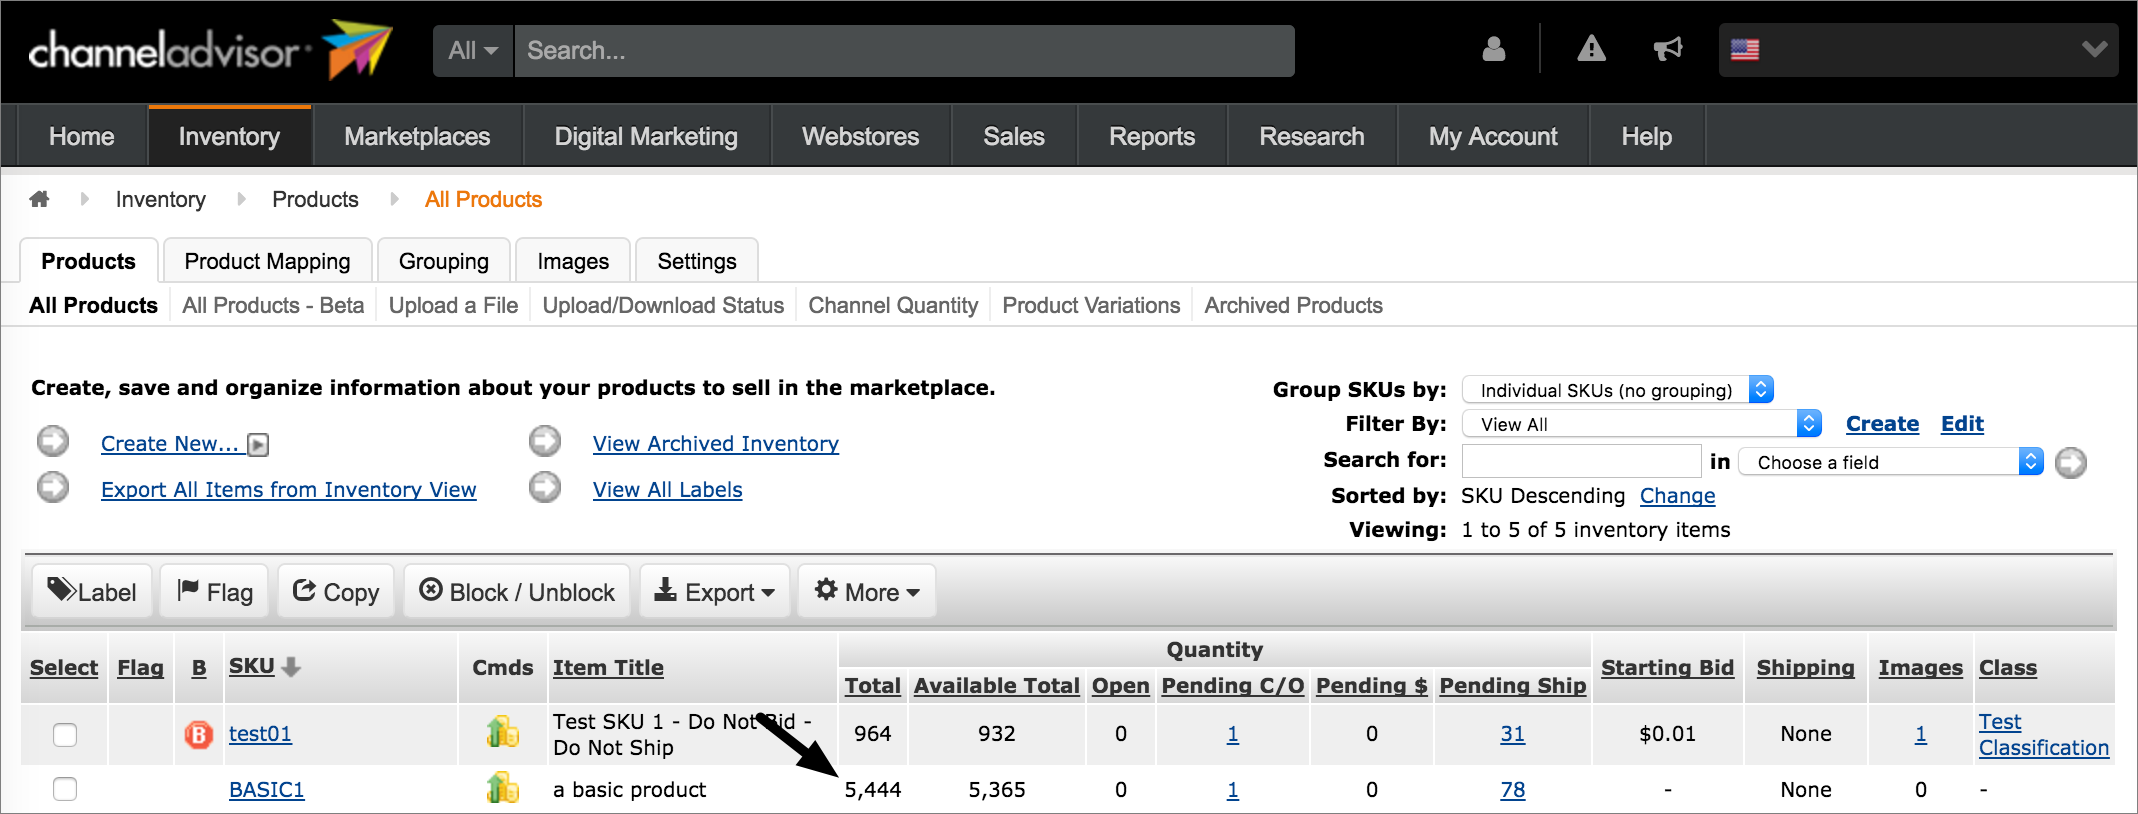
You will be able to compare the following information on the two sites as shown above:
- The Orderable Quantity in Infoplus matches the amount calculated by subtracting Pending C/O from Total in ChannelAdvisor. Example: In the screenshot above, the calculation for the SKU “BASIC1” is 5,444 - 1 = 5,443, which is the amount shown as the Orderable Quantity in Infoplus.
-
The Infoplus-ChannelAdvisor Integration is complete.
