WooCommerce InfoplusConnect connects your WooCommerce store to your Infoplus account for optimized order fulfillment. You can automatically sync orders and inventory with Infoplus, and get live tracking updates as orders are shipped from your warehouse.
Installation
- Download the extension from your WooCommerce dashboard.
- Go to Plugins > Add New > Upload and select the ZIP file you just downloaded.
- Click Install Now, and then Activate.
- Click the Configure link and read the next section to learn how to set up and configure the plugin.
Fulfillment Overview
Infoplus connects with WooCommerce to support inventory sync and automated tracking updates. This allows you to automatically sync your Infoplus and WooCommerce orders. Here's the basic usage and purchasing workflow:
- You connect your store to your Infoplus account, and ensure that Infoplus SKUs match WooCommerce SKUs that should be Infoplus-managed.
- Infoplus-managed products will automatically start synching inventory from Infoplus for matching SKUs.
- When a customer purchases products that are managed by Infoplus, these orders are automatically sent to Infoplus once they reach "paid" status (processing or completed status). This will create an order record in Infoplus for the managed products, listed as "On Order". If an order contains unmanaged products, these will not be synced, and must be fulfilled manually.
- Infoplus receives the order from WooCommerce, and guides your warehouse's picking/packing process based on your optimization rules, updating the status and inventory on the Infoplus side. These updates are synced back to WooCommerce.
- Infoplus ensures you get the best shipping rates from available providers and helps your warehouse print label, packing lists, or shipping documents.
- Once the order has shipped from your warehouse, Infoplus updates the order and any available tracking information will be pushed to WooCommerce automatically. This information will be shown in the "edit order" screen to admins, the customer "Order Complete" emails, and the customer account.
- When all parcels for an Infoplus-only order have been marked shipped, you can opt automatically complete the order.
- Your customers receive their orders on-time, while shipping and order management are optimized for you.
Setup and Configuration Connect to Infoplus
In order to set up the WooCommerce Infoplus Connect plugin, you'll need to connect your WooCommerce store to your Infoplus account, then also configure the plugin settings within your website.
Connect to Infoplus
- Log into your WooCommerce store, along with your Infoplus Account using the URL and credentials you've received from Infoplus.
- Go to "Account management", and click on "Shopping Cart" under Connections.
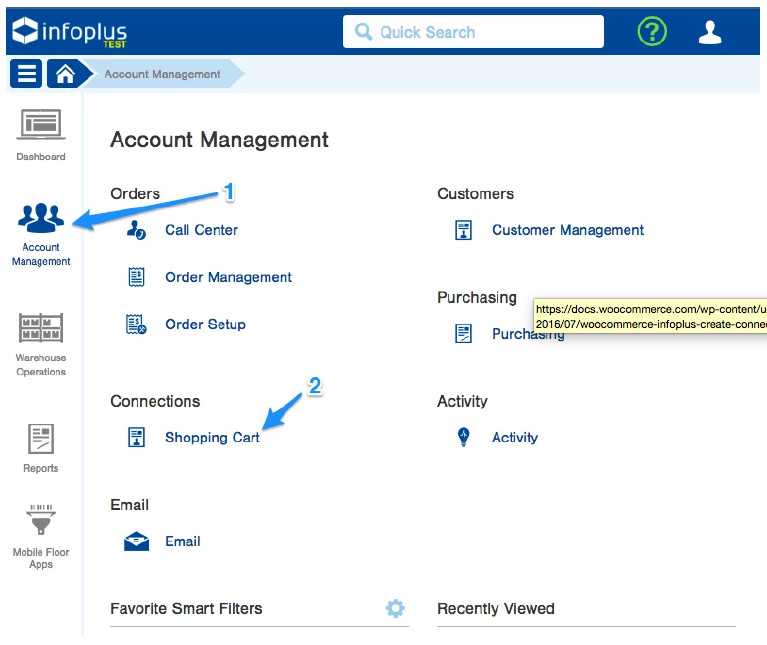
- Click "Shopping Cart Connection" to start your connection setup.
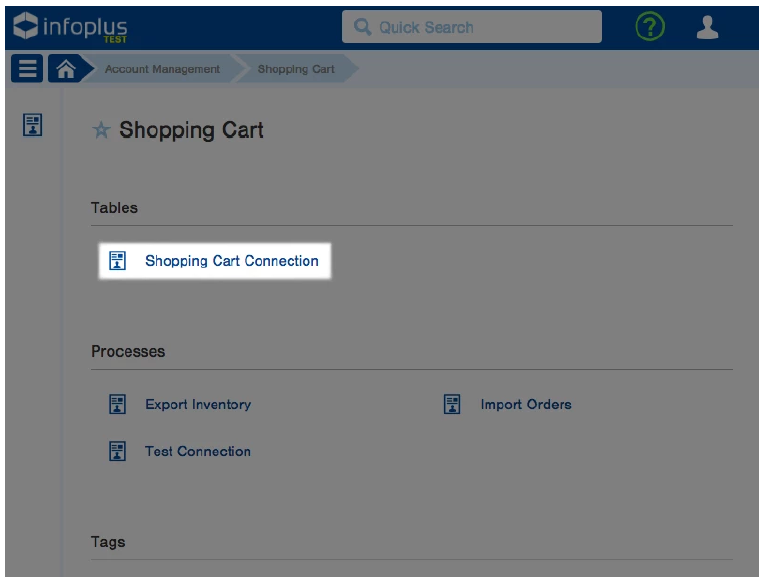
-
Click the "Create New" button in the top right to set up a connection to your WooCommerce store.
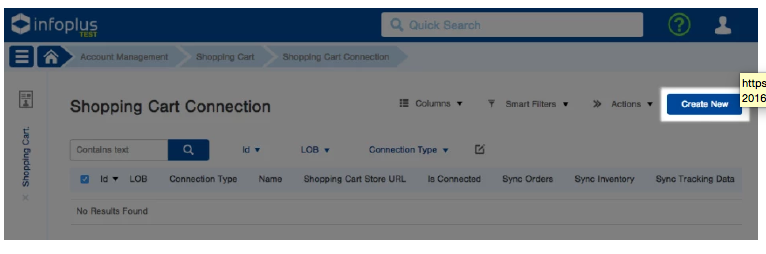
- Enter the details for this cart connection. Most of the settings are flexible, but you should ensure you configure the following settings exactly:
- Connection Type - WooCommerce
- Sync Orders - True
- Infoplus SKU Field To Map - SKU
- Shopping Cart Store URL, NOTE: do not include "www" or " / " at the end of URL

- Once you've configured your connector settings, click "Save". You'll now see your new cart connector app, which we'll now connect to your WooCommerce store. Click on the link that says, "Click here to connect."
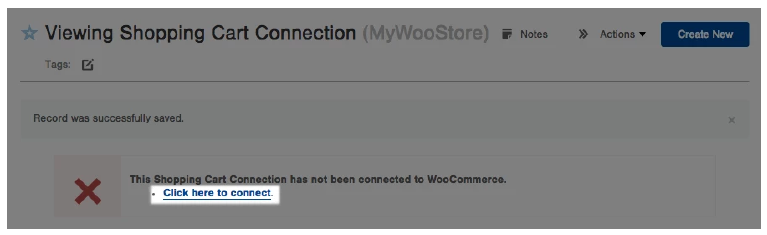
-
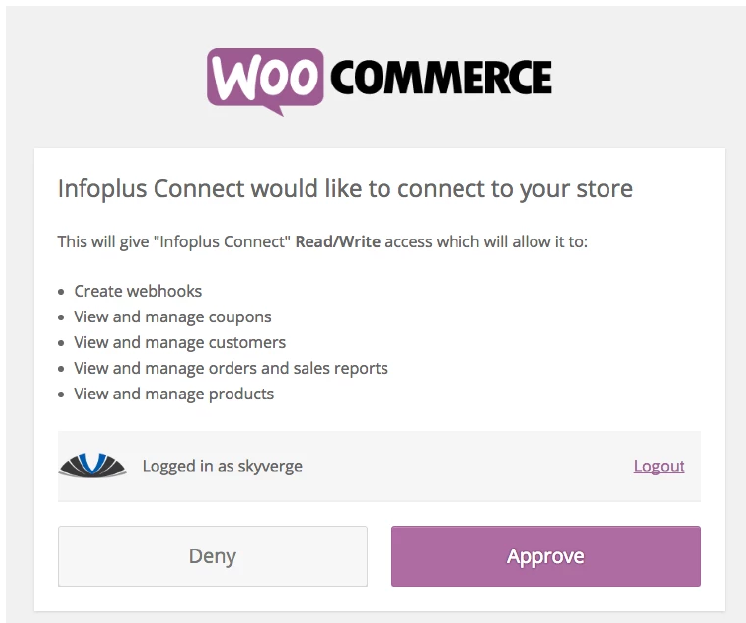
You'll now see a permission screen, letting Infoplus communicate with your store to update order and product data. Click "Approve" to complete the connection.
-
Your WooCommerce store is now connected to your Infoplus account using the settings you've configured within Infoplus. You can enable management for your products and orders using the plugin.
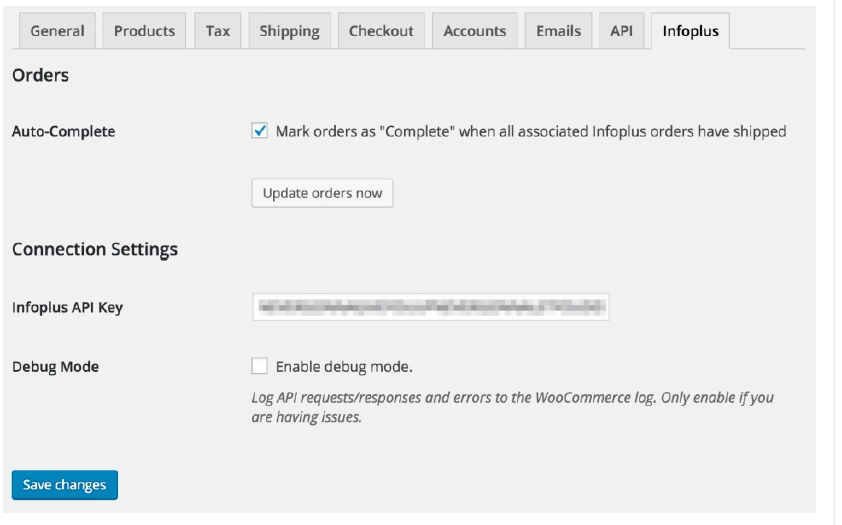
Extension Settings
- Auto-Complete - Enable this to auto-complete orders that contain only Infoplus-managed products when all parcels have shipped.
- Infoplus API Key - This setting will automatically be filled in when you connect to Infoplus. It's available only if you need to refresh at the direction of Infoplus. It's available only if you need to refresh it at the direction of Infoplus.
- Debug Mode - Enable this to log error messages to the plugin log, located under WooCommerce > System Status > Logs. For best performance, please only enable this if you are having issues with the plugin.
In order to sync items with Infoplus, you must ensure that your WooCommerce SKU matches the SKU you've set for your item within Infoplus. When creating a new item in Infoplus, note the SKU for the item. 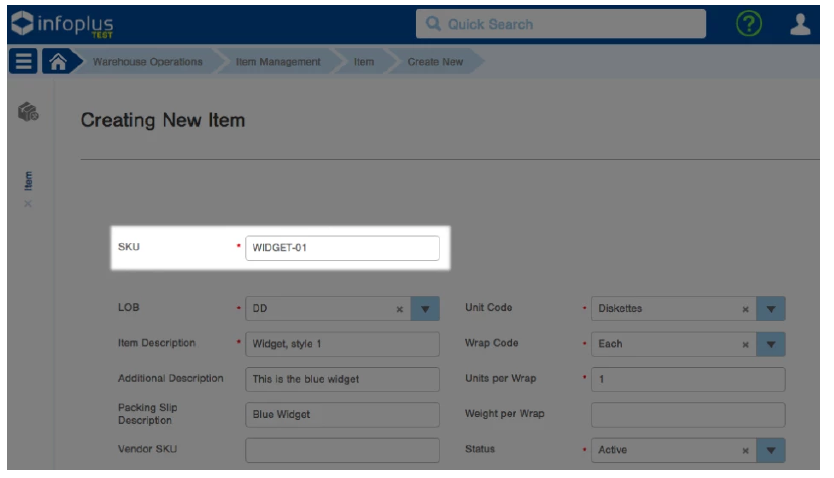
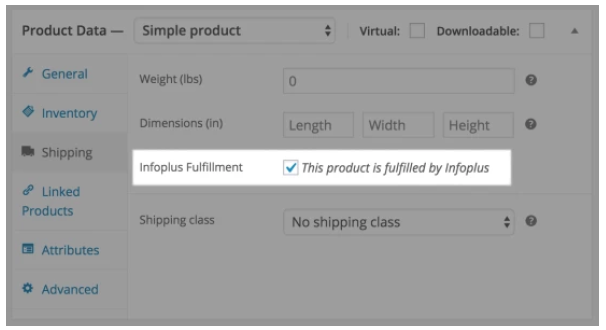
Ensure that this SKU is used within WooCommerce under the "Shipping" tab, and that "Infoplus Manage?" is enabled for a product to enable synching.
You can also enable "Infoplus Managed?" for multiple products using the product bulk actions.

Order Management
When an order is paid for (typically processing or completed status), it will automatically be sent to Infoplus without any further action needed. This also supports custom "is paid" statuses created with WooCommerce Order Status Manager for automatic order submission.

The products that are Infoplus-managed will have an Infoplus order created, and will be shown on the orders page in a new "Infoplus Orders" box.
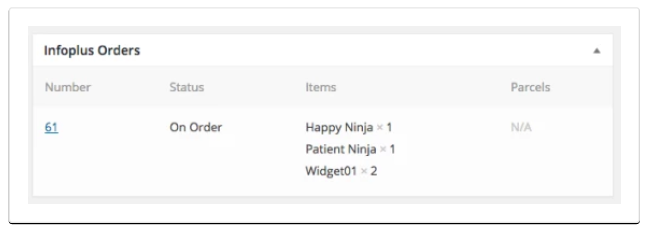
When Infoplus has updates available for the order, they will be pushed to your WooCommerce store automatically, and this Infoplus Orders box will automatically update with any sub-orders or parcel information. Admins will also be able to see parcel data or view tracking information with one click.
If you opt to auto-complete orders within your Infoplus settings, the order will be marked completed if:
- all products in the order are managed by Infoplus, and
- all parcels have been marked "shipped".
Customer Views
Customers will see shipment information in a couple of places when Infoplus-managed products are being shipped.
When viewing the "View Order" screen from the "My Account area, customers will see a "Shipments" table added below the order details. This will display shipment information and tracking numbers for all Infoplus parcels, making it easy for customers to get tracking updates with one click.
Customers will also see the "Shipments" table within the completed order email to get tracking data.
Troubleshooting
- Please ensure that your store is connected to Infoplus via the settings.
- Ensure that any items that should be managed via Infoplus have Infoplus managed? enabled, and use a SKU that matches Infoplus. If you're not sure whether this is configured correctly, run a test order and check the order notes for the item.
- Are your stock levels and orders synced and completely up-to-date with Infoplus?
- If you are still having issues on the WooCommerce side, enable debug mode under WooCommerce > Settings >Infoplus, try to reproduce the issue, and submit the information found under WooCommerce > System Status > Logs within the infoplus.log along with your help request.
- Do not change the 'Customer Order No.' from the WooCommerce Order Id. Doing so will break the Order Status Updates and not allow you to sync Order Data back to WooCommerce from Infoplus.
- If you want to pull your customer-defined Order No to WooCommerce, create a custom field instead.