A Replenishment Process creates the work to refill a Pick Face Assignment. The Pick Face Assignment must already be created. See Create a Pick Face Assignment for help.
You can Create a Replenishment Process on Pick Face Assignments that you select (instructions below), or you can create a Replenishment Plan to run the replenishment process on a filtered list of Pick Face Assignments. You can run a Replenishment Plan as often as needed. See Create a Replenishment Plan. NOTE: For further efficiency, you can schedule a Replenishment Plan to run automatically on specific days and times. See Create Scheduled Plans for more information.
How to Create a Replenishment Process
- Access the "Pick Face Assignment" table. Two methods:
From the Dashboard: Click the “Warehouse Operations” tab, click the “Replenishments” App, then click the "Pick Face Assignment” Table.
From the Quick Actions shortcut: Press a dot (period) on your keyboard, then select “Pick Face Assignment” from the list of Quick Actions. - Click the checkbox next to each Pick Face Assignment that you want to replenish. You can replenish multiple Pick Face Assignments at a time.
- Click the Actions button and select Create Replenishment Process. The Create Replenishment Process window displays.
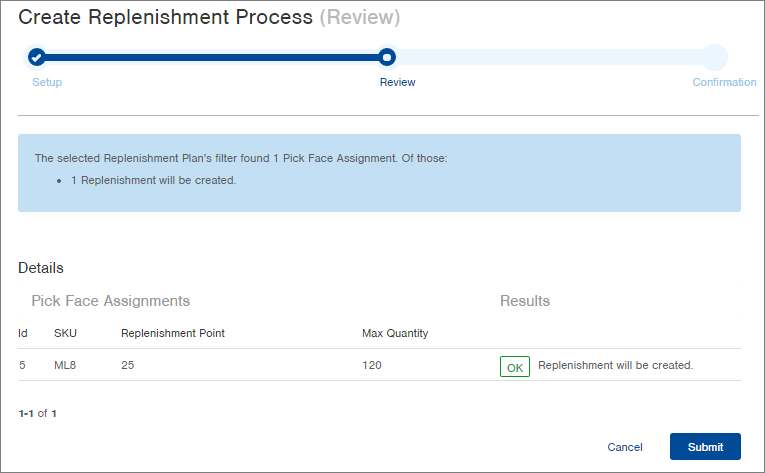
- Review the Results column for each Pick Face Assignment to see whether a replenishment will be created.
NOTE: You may see warnings and errors based on inventory available or other open replenishment processes.
- Click Submit. All replenishments that could be created will be processed. This process creates the Pick and Put Away work tickets for replenishment.
- If you want to print the work tickets associated with the replenishment processes you just created, click the Next Steps button and select Print Work Tickets. Click the Download Report button to download a PDF file containing all of the work tickets.
NOTE: You can also print work tickets from the Work table. See Create Work Tickets.
