Infoplus Support can help with general questions about how scripting works. For help with a specific script or its outputs, you will need to submit a Pro Services request for paid support. Pro Service request form can be found here.
After you've set up an EDI Connection in Infoplus, and added Document Types to it, you will need to confirm that Inbound documents from your partner can be successfully processed. You can either have your trading partner send you one or more test documents over the established AS2 connection, or you can manually create an EDI Document record in Infoplus (pasting in a Body based on your partner's spec).
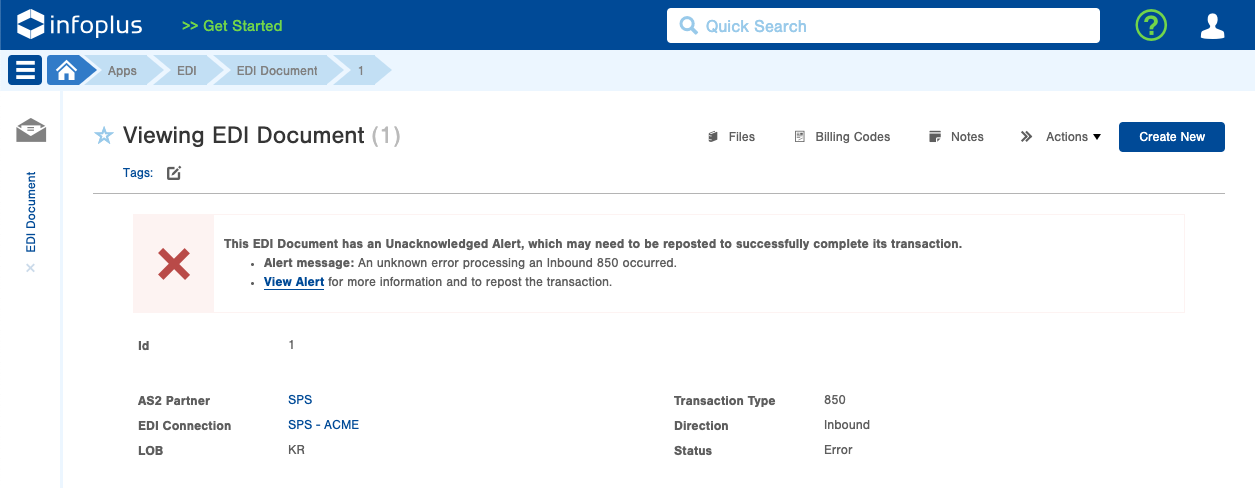
Once you have one or more EDI Documents, there is a chance that they will fail to process successfully. You'll know this is the case if you have see a Status of Error, and an alert message when viewing the EDI Document in Infoplus:
If this is the case you may need to either edit the EDI Connection, to change, for example, the fields used for SKU Mapping, or to add a default Carrier. However, if you need further custom mapping for this Document Type for this EDI Connection, you can do that in Infoplus using a Script. This article describes how to create such as script, and how to test that mapping, to get your documents successfully processing.
Create Script
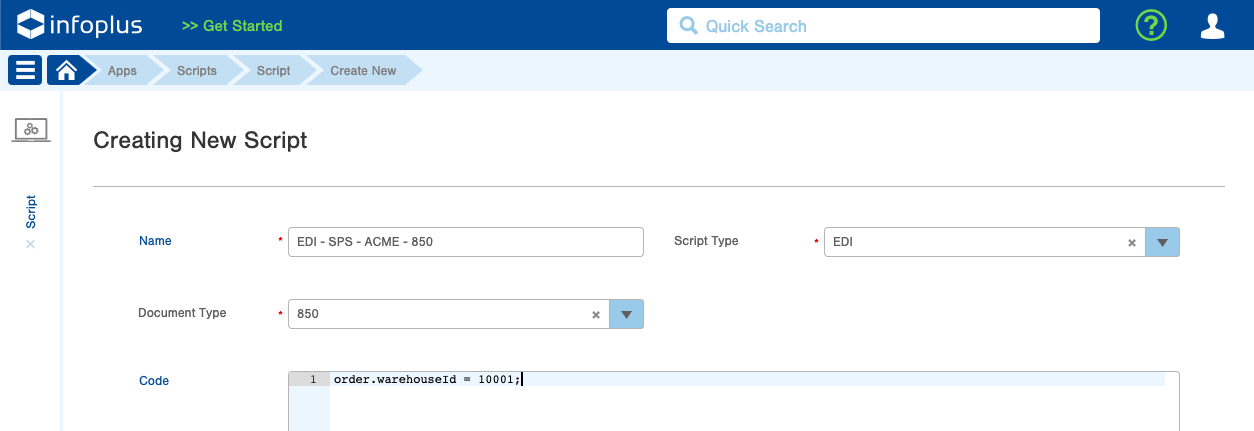
1. Navigate to the Script table in Infoplus, and create a new Script record, with the following values:
- Name: It is suggested to use a name that indicates both the EDI Connection's name, as well as the Document Type.
- Script Type: EDI
- Document Type: choose the document being mapped - in this case, 850.
- Code: The code that you'll need to do this custom mapping will depend on what values you need to parse out of the inbound document, or what values you need to set in the record being created in Infoplus. In the example here, a hard-coded warehouseId is being set in the order object. For more details on the code you may need in this script, see Using EDI Scripts.
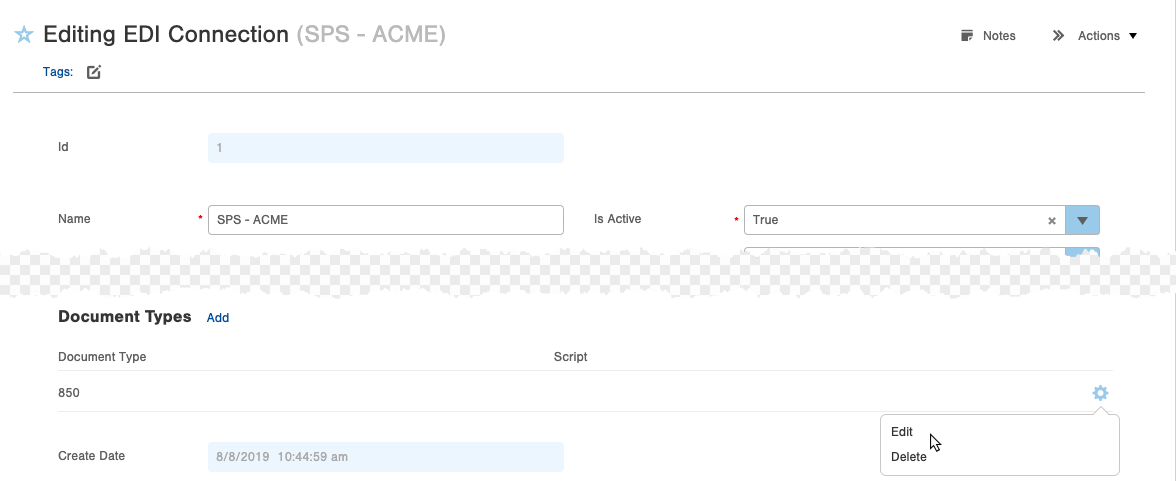
2. After you have created the Script, you can then edit your EDI Connection, edit the Document Type that you need to apply the script to, and select the script.
Repost Document
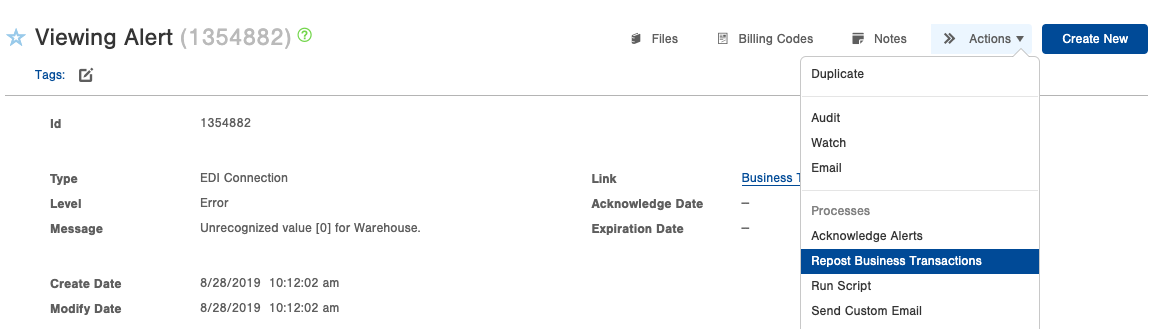
Once you have a mapping Script assigned to the Document Type on the EDI Connection, you are then ready to re-post the EDI Document that is in Error status. To do this, navigate to the EDI Document, and you can click the View Alert link in the alert box on top of the page. This will take you to an Alert record, which should give some explanation of why the document failed to process.
Once you believe you have corrected the issue (via your script or changes on the EDI Connection record), run Repost Business Transaction from the Alert's Actions menu.
This action will schedule the EDI Document for reprocessing, during which the EDI Document's Status will be Pending.
After the job runs to reprocess the document, it will either move back into Error status, with a new Alert and error message, or, if it was successful, it will move to the status of Complete.
If there is a new error, you may need to edit your script (to apply additional mapping logic, or to fix errors in the script), then repeat the process of viewing the Alert and running Repost Business Transaction.
