To trade EDI Documents with a partner in Infoplus, you must first set up an AS2 Partner record that defines how Infoplus and your partner will exchange documents. After establishing an AS2 Partner record, you can then create one or more EDI Connection records from a single AS2 partner.
Infoplus AS2 Details
When you are talking to your partner, preparing to establish your connection, they will need the following information from you, which defines how they can exchange AS2 messages with Infoplus.
| AS2 URL | Replace ${client-sub-domain} with your infoplus sub-domain in this URL: https://as2.infopluswms.com/infoplus-edi-as2Receiver/${client-sub-domain} I.E. for an Infoplus site with the URL https://myaccount.infopluswms.com, the AS2 URL is https://as2.infopluswms.com/infoplus-edi-as2Receiver/myaccount Note that you will have a different URL for your Infoplus production site and for your Infoplus test site, if you have one. |
| AS2 Id | infoplus |
| AS2 Qualifier | ZZ (this can be any agreed-upon value) |
| Sign Documents | Yes |
| Signature Algorithm | SHA-1 |
| Encrypt Documents | Yes |
| Encryption Algorithm | Triple DES (3DES) |
| Synchronous MDN | Yes (Preferred) |
| Certificate | infoplus.cer |
Setting up the AS2 Partner
To setup a new AS2 Partner in Infoplus, after you have received your partner's AS2 connection details (as mentioned above), navigate to the AS2 Partner table and click Create New.
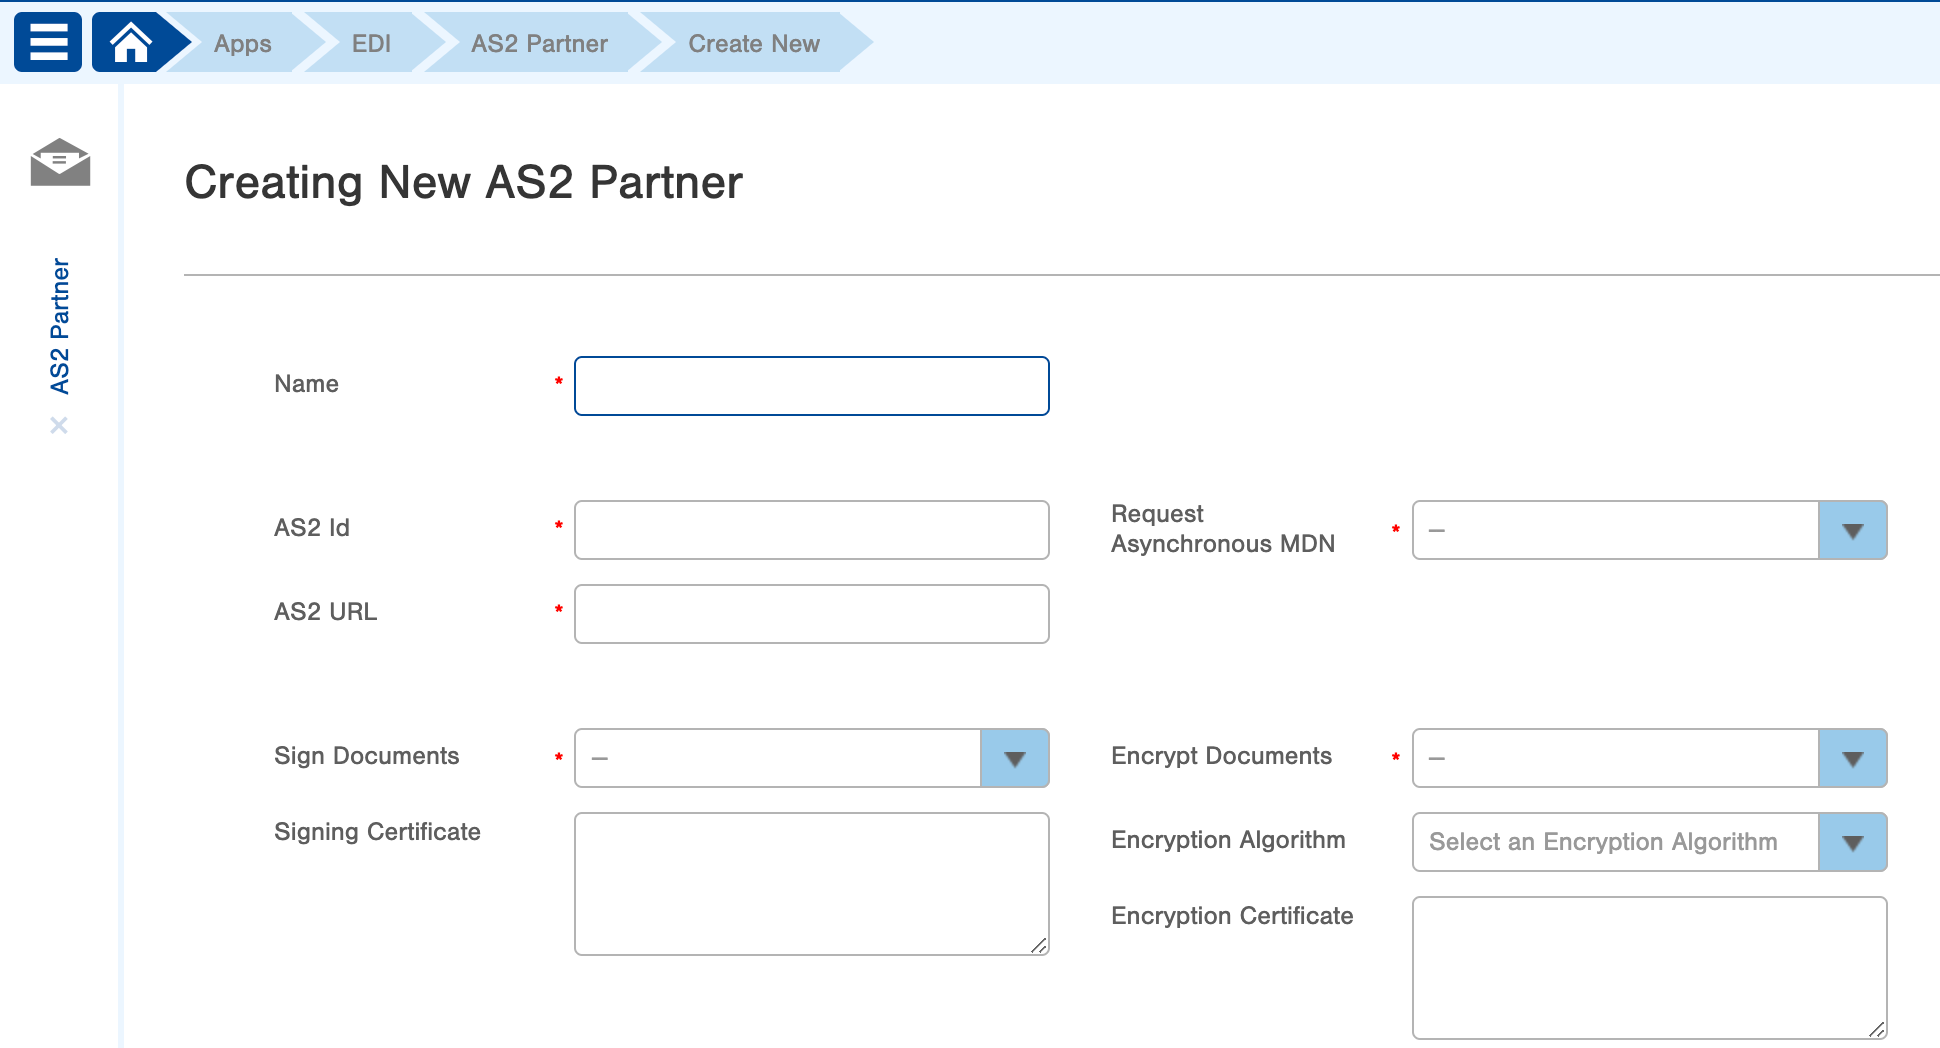
- In the Name field, give this AS2 Partner a meaningful name for identification purposes.
- Enter the AS2 Id and AS2 URL that the partner has given you.
- For the Request an Asynchronous MDN field, it is recommended to select False - but, if your partner requires Asynchronous MDN, then select True.
- If your partner will be Signing Documents that they send to you, set that field to True, then paste in the partner's Signing Certificate in the text box below. The certificate should be in PEM format.
- If you want to send encrypted documents to your partner, set the Encrypt Documents field to True, select the Encryption Algorithm to be used, and then paste in the partner's Encryption Certificate in the text box below. The certificate should be in PEM format. Note that in most cases, you will use the same certificate for both the Signing Certificate and the Encryption Certificate.
- Save the connection record.
When you are finished creating an AS2 Partner, you can then proceed with creating EDI Connections.
Troubleshooting
If you are receiving an error on your EDI document, go to the Logs tab in the EDI Document. If the error is "error attempting to send via AS2", contact your AS2 provider for additional logs.
In addition, if the error persists, try creating a new AS2 connection and verify your ID, URL, and certificate.
