For certain fields in an Item record, you can add your own value options to their drop-down menus. Defining your own values gives you more control over how you identify and report on Items in your warehouse.
For example, add your own categories for grouping items in a catalog (e.g., Apparel, Electronics, etc.). Here's how it would work:
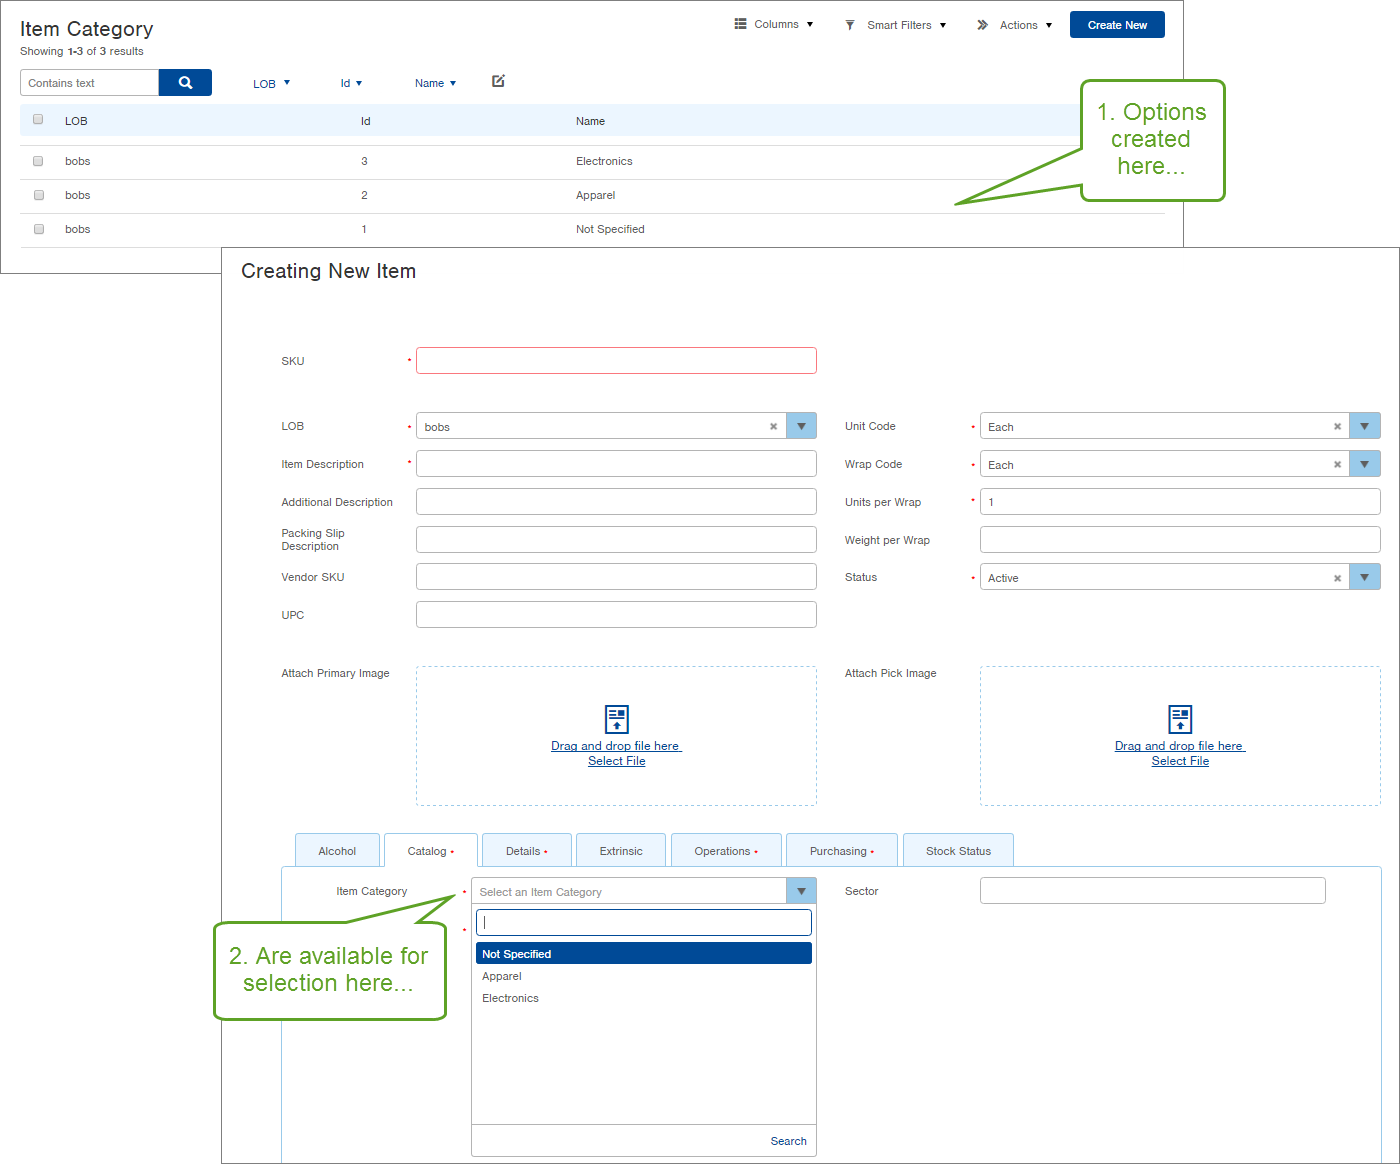
- In the Item Category table, create a record for the "Apparel" category and a record for the "Electronics" category, and so on.
- When creating a new item, the Item Category field's drop-down menu will display the values you created.
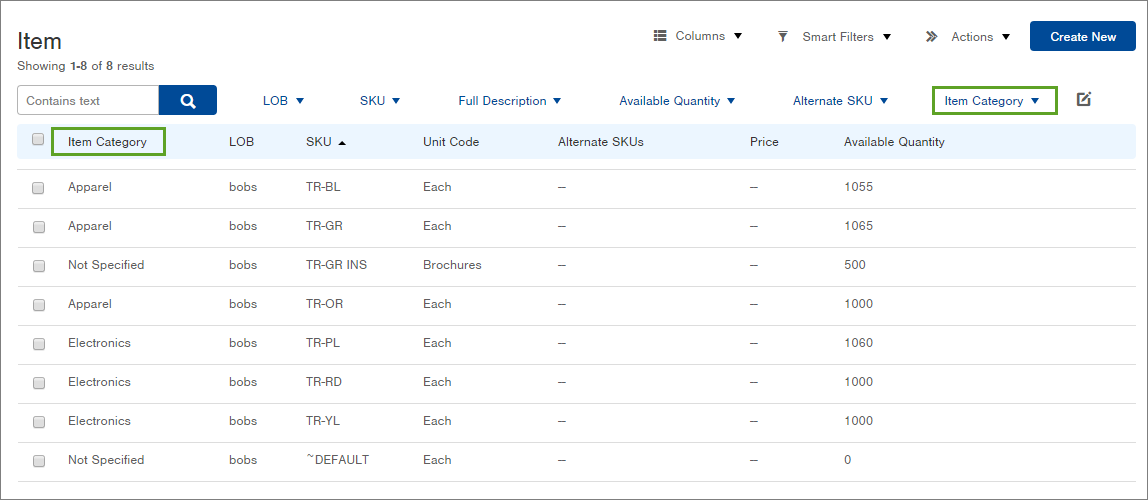
You can also add this column criterion to the Item table to be able to search by the values. Here's an example of the Item Table where Item Category has been added as query criteria and the Item Category column has been made visible in the table:
List of Fields
These are the fields you'll see in an Item record to which you can add value options. You can use these fields however you'd like, but examples have been provided for some of the fields.
Details Tab- Item Account Code - A code to use for grouping and sorting items for Accounting (e.g. If Accounting wants to see cost of goods by different codes, assign an Item Account Code to an item)
- Item Summary Code - A code to use to group items into budget categories on month-end inventory summaries
- Item Category - An identifier for grouping and sorting items in a catalog (e.g. Apparel, Electronics, etc.)
- Note: Leading Zeroes are not allowed in this field. Example: A value of 002 will not be accepted, but a value of 2 will be accepted.
- Item Sub Category - An additional category identifier to use for grouping and sorting items in a catalog (e.g. Women's Apparel, Men's Apparel)
- Note: Leading Zeroes are not allowed in this field. Example: A value of 002 will not be accepted, but a value of 2 will be accepted.
- Item Sector - An identifier for catalog permission access in EStore, and for grouping and sorting items
- Production Code - An identifier used for grouping (e.g. used in Lowstock notices to show items that can be ordered together for a discount)
- Item Buyer - The person who is responsible for buying more of an item
- Item Lowstock Code (may not be visible for everyone based on Infoplus setup) - An identifier for grouping and sorting items
- Legacy Lowstock Contact (may not be visible for everyone based on Infoplus setup) - The contact when a reorder of the item is needed
Create Value Options in Item Fields
- To add value options to any of the fields referenced above, you need to access the same-named table. For example, to add a value option to the Item Category field, access the Item Category table. Two ways:
- From the Dashboard: Click the Warehouse Operations tab, click the Item Management app, then click on the appropriate Table name.
- From the Quick Actions shortcut: Press a dot (period) on your keyboard, then select the appropriate table from the list of Quick Actions.
- Once you have accessed the table, click Create New. The following three fields will display:
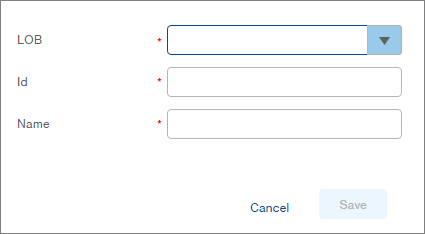
- In the LOB field, select the Line of Business where you will use these options.
- In the ID field, type a unique identifier for the option. All tables, except Item Sector and Item Account Code, require the ID to be a number.
- In the Name field, type the name that will appear when selecting this option in the Item record (e.g. if you want "Apparel" to display as an option in the Item Category field, type Apparel).
Here's an example of the Apparel Item Category record: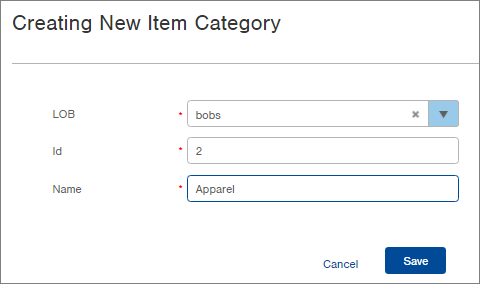
- Click Save. The value will now be available from the field's drop-down menu when creating or editing an Item record, and the data can be used when searching in the table.