If you need to transfer a product from one warehouse to another, create and execute a Transfer. This is done by creating an Order with a Service-Type of "Transfer" and running the "Execute Transfer" process. Then fulfill the order and receive the inventory into the other warehouse.
Key Points About Processing Transfer Orders:
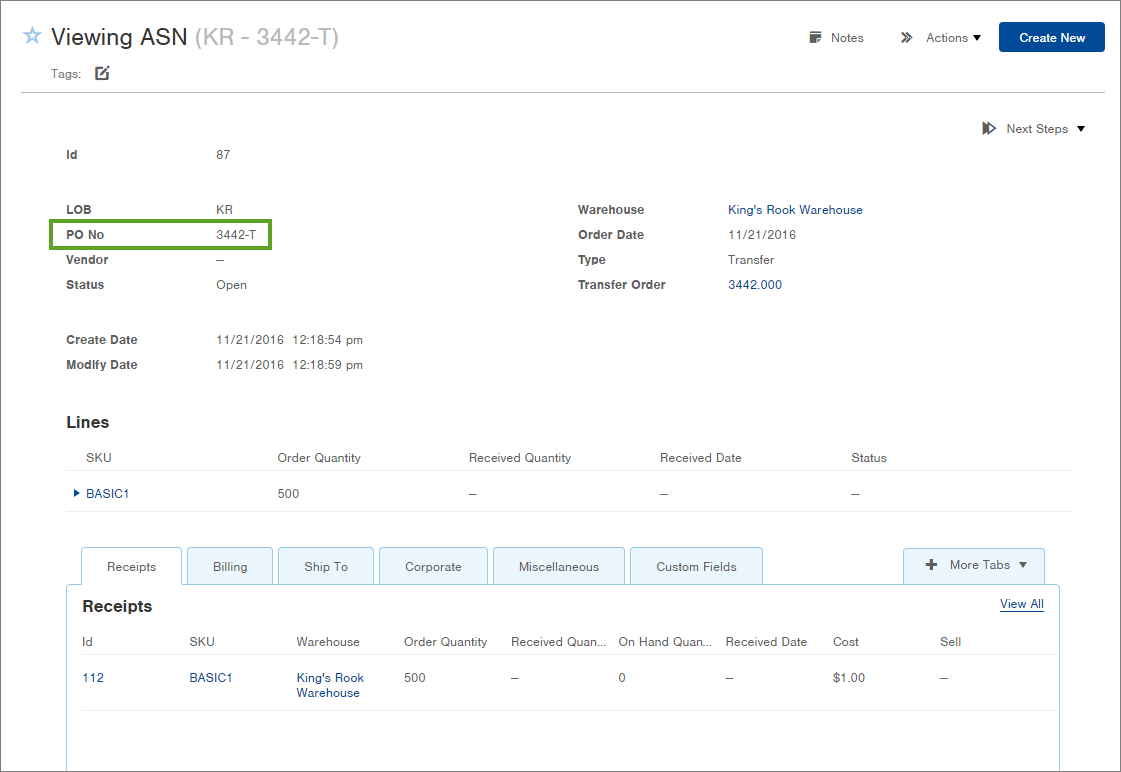
- A Transfer Order must be executed via the Execute Transfer action on the Order record. Once this has been initiated, a Transfer ASN will be created that is used to process receipt of the items into the other warehouse. The PO Number for the ASN will have a "T" at the end of the number.
- Once you receive items from a Transfer ASN:
- The Item Receipt record will show 0 Received Quantity so the transfer does not appear as a second receipt of the item(s). The PO Number showing the "T" will display in the Item Receipt record to indicate that the items were received from a Transfer Order.
- In addition, to register the updated inventory, an Inventory Adjustment will be created to adjust the inventory of the item(s). The Inventory Adjustment record will show an Adjustment Code of "Transfer".
Create a Transfer Order
- Create an Order like you normally would, but select Transfer in the Service Type field.
NOTE: A Customer is required. You may consider creating a Customer record for each of your warehouses.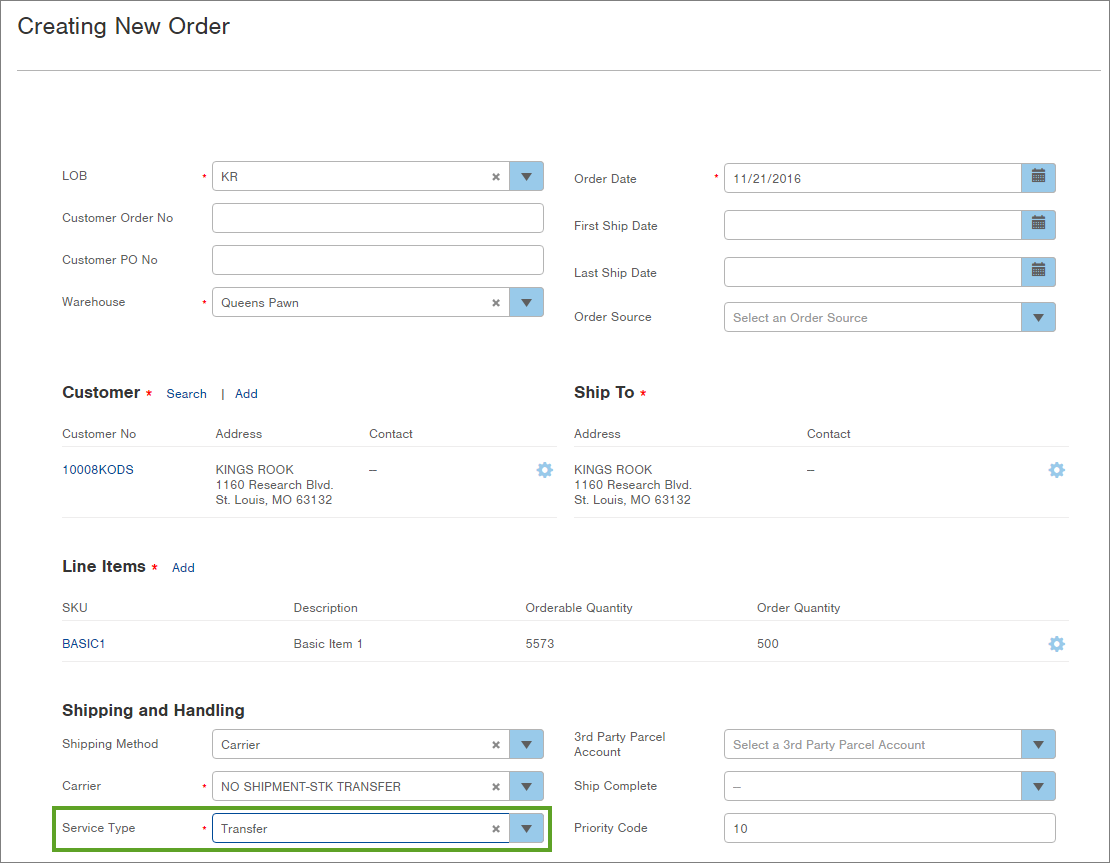
-
The Carrier will default to a stock transfer carrier.
-
Save the Order.
Execute the Transfer
NOTE: A Transfer Order should be executed AFTER it enters a 'Processed' status to avoid incorrect item quantities from populating on the auto-generated Transfer ASN.
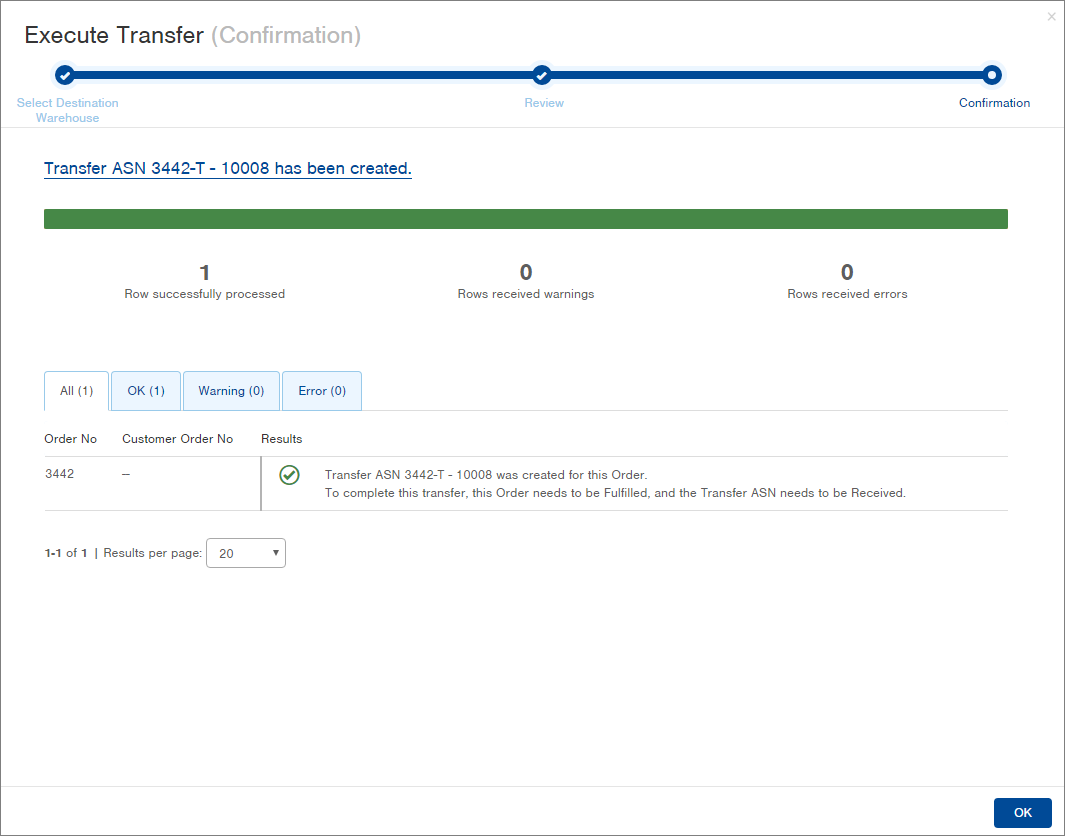
- From within the Order record, or with the Order selected in the Order table, select Actions >> Execute Transfer. The first step in the process displays.

- In the Destination Warehouse field, select the warehouse that the inventory is being transferred to.
- Click Next. The Review step in the process displays. If the transfer(s) can be executed, the "Results" will indicate that a Transfer ASN will be created for each order.

-
Click Submit. The Confirmation step displays. The "Results" will indicate the ASN number for each order. It will also indicate the next steps to complete each transfer: Fulfill the Order and Receive the Transfer ASN.
-
Click OK to exit the process. You will be taken back to the Order table.
Fulfill the Transfer Order
To fulfill a Transfer Order, follow the same fulfillment process as you would for any order, making the necessary fulfillment selections. See Run Fulfillment for more information.
NOTE: One consideration specific to Transfer orders is regarding shipping:
- If you will be shipping the order to the warehouse using a parcel carrier (e.g., because the warehouse is in a different state), you might ship the order using the Shipping Station Mobile App.
- If you will not be using a parcel carrier (e.g., because just a stock transfer), you might choose to use the Ship Non-Parcel Order process to ship the order.
Receive the Transfer ASN
Once a Transfer Order has been fulfilled, a Transfer ASN for the item(s) will be created. You can now receive the items as you would for any Advanced Shipping Notification.
NOTE: For an ASN created through a Transfer Order, the PO Number will show a "T" at the end of the number. However, if you are creating an ASN from the ASN table and select the "Type" to be "Transfer", the ASN name will not contain a "-T".
Here's an example of an ASN record that was created after fulfilling a Transfer Order.
Continue through the receiving process by either using Interactive Receiving in the Mobile App, or creating a Receiving Worksheet in the Desktop App, closing the worksheet, putting the items away, and committing the item receipts.
The transfer is complete. ![]()