In Infoplus, every order and shipment is linked to a Carrier record. This record provides essential shipping information for accurate order processing and label generation.
- Parcel Carriers: For standard parcel carriers like FedEx or UPS, the Carrier record specifies both the shipping company and the specific service level being used (e.g., FedEx Ground, UPS Next Day Air).
- Non-Parcel Carriers: For non-parcel carriers such as LTL trucks or local couriers, the Carrier record simply identifies the company used for shipping.
Accessing the Carrier Table
To manage the Carriers that you have access to in Infoplus, you can use the Carriers table. There are two way to access the Carrier table:
- From the Dashboard: Click the Apps tab, then select the Manifest Setup app and choose the "Carrier" table.
- Using Quick Actions: Press the period (.) key on your keyboard and select "Carrier" from the list.
In this table there are several actions you can take to customize the carrier options you have available:
Create a Parcel Carrier
To set up a new parcel carrier and service in Infoplus, follow these steps:
- Navigate to the Carrier table.
- Click the "Create New" button in the right hand corner. A "Creating New Carrier" screen should appear.
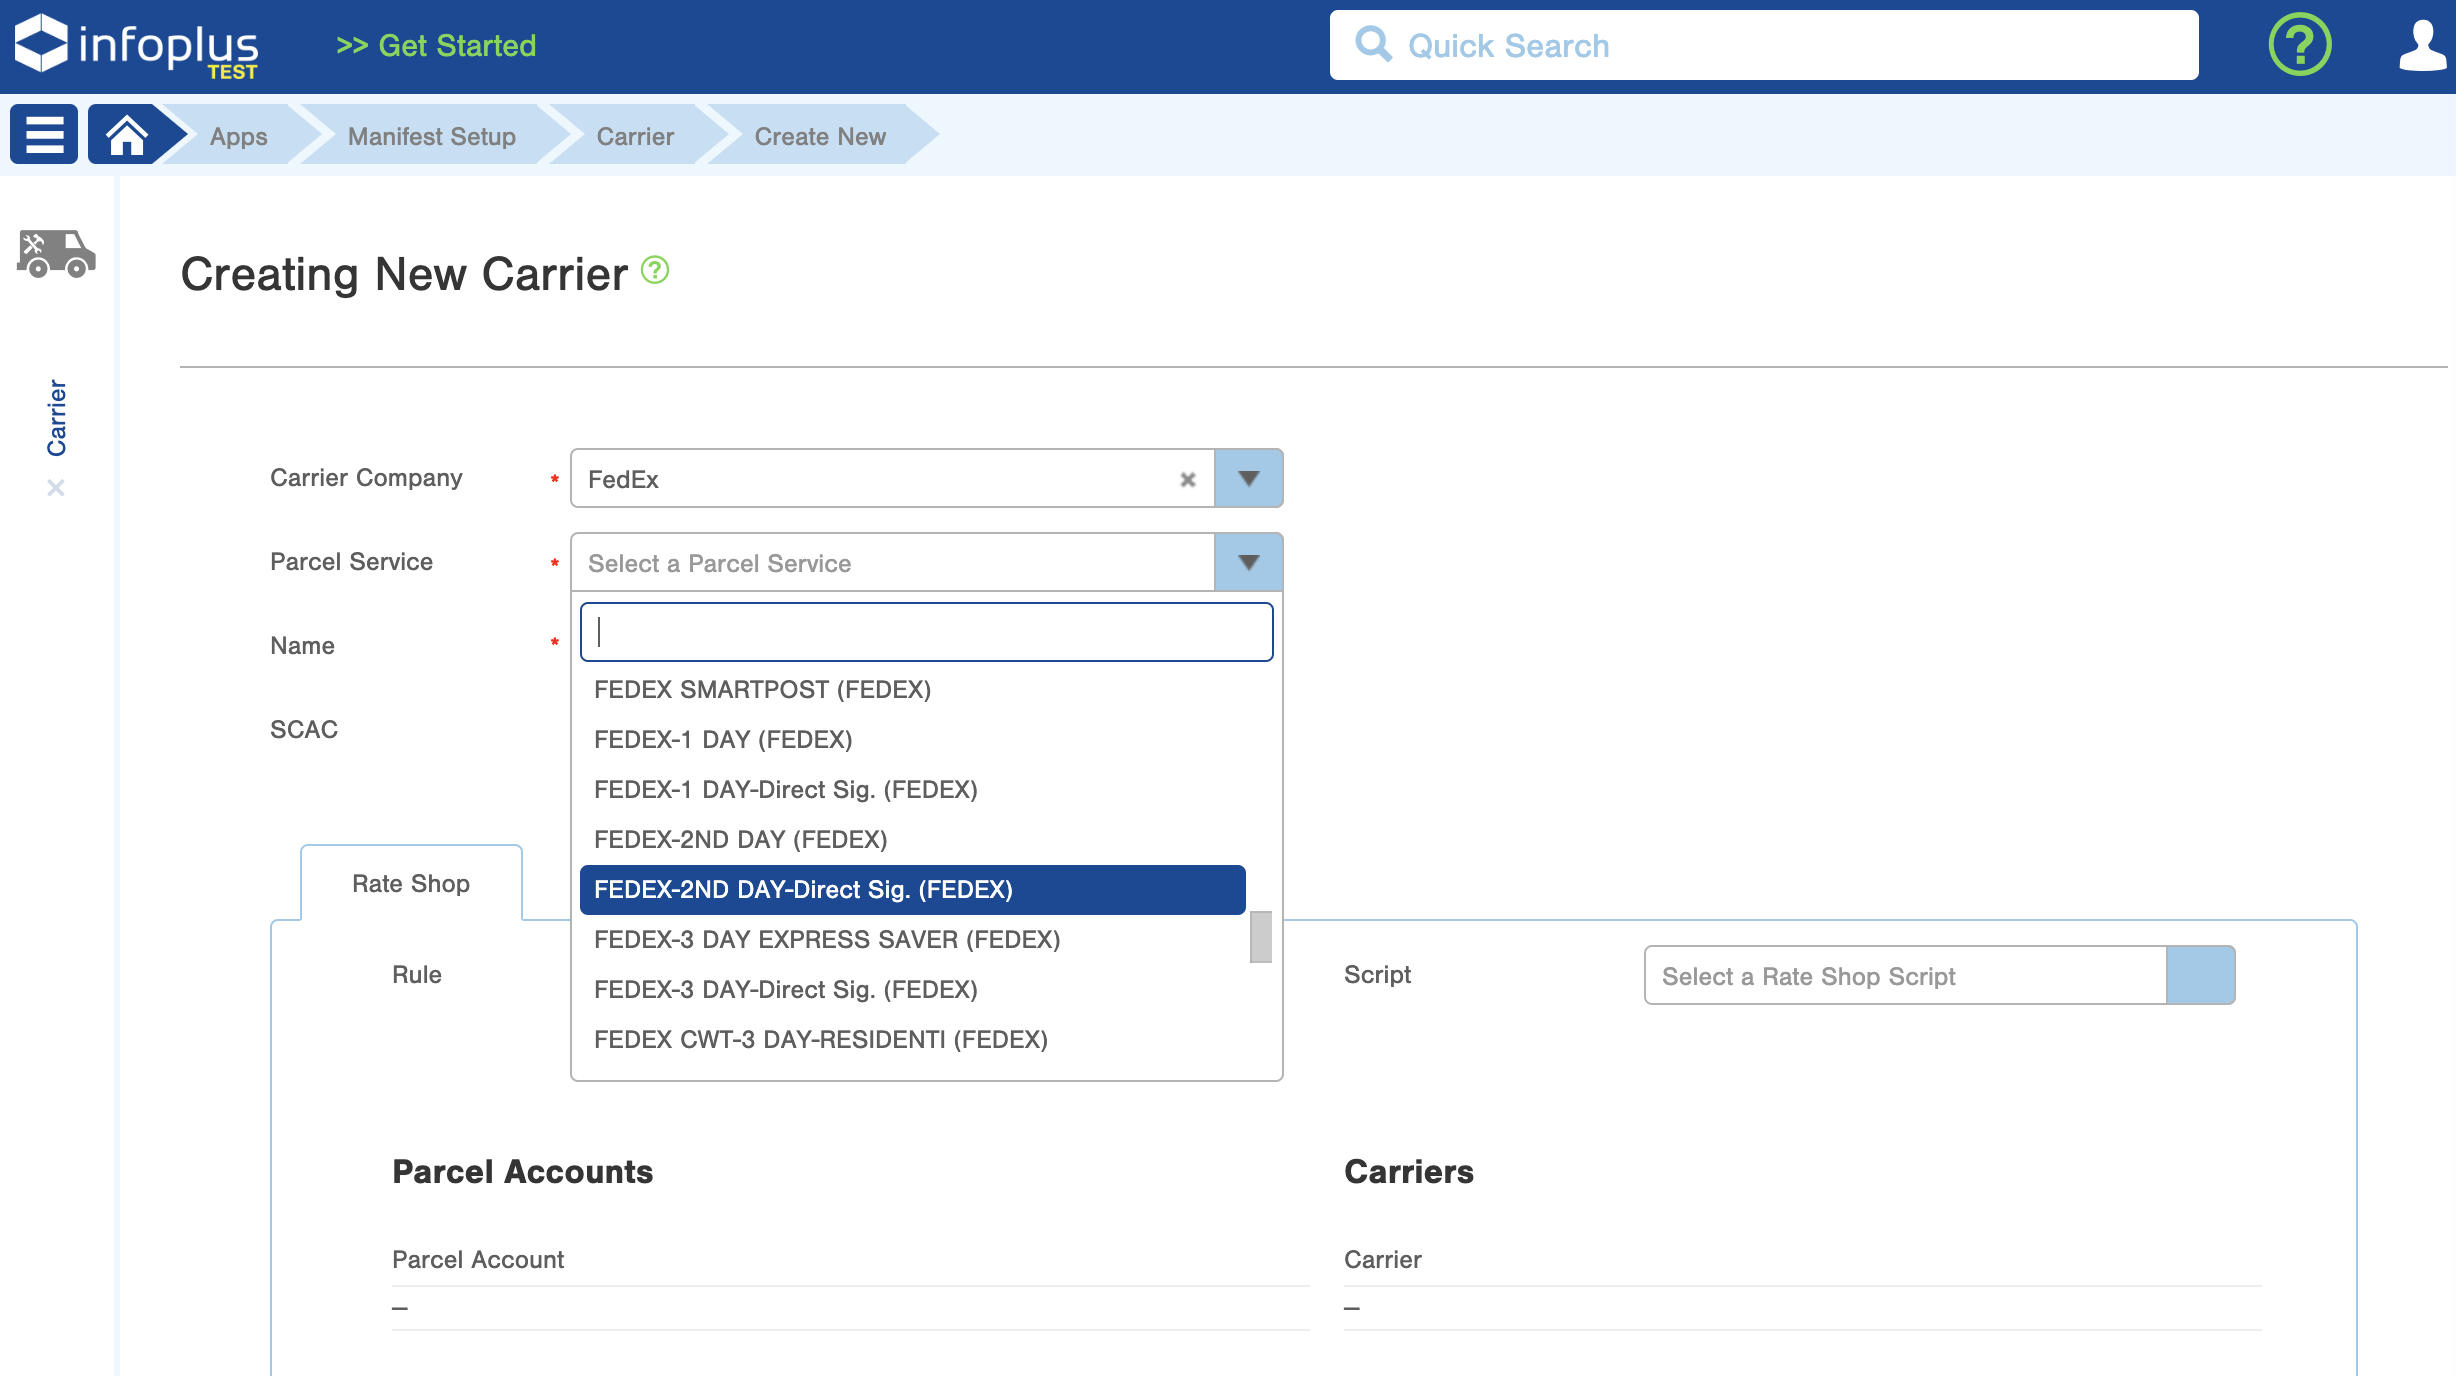
- In the Carrier Company field, choose the carrier (e.g., FedEx, UPS, USPS) from the available options.
- In the Parcel Service field, select the specific service offered by the carrier (e.g., FedEx 2-Day Air, UPS Ground) that you would like to apply to orders.
-
Note: Pay attention to the Parcel Service name you select. Certain Parcel Service names may indicate that additional shipping options (like "Signature Required") will be automatically applied to orders.
-
For example, if you select "FEDEX-2ND DAY - Direct Sig. (FEDEX)" Infoplus will automatically apply a "signature required" shipping option/accessory.
-
- Enter a descriptive Name for the carrier record (e.g., "FedEx 2-Day Air"). This name will be displayed throughout Infoplus - when creating an order, printing a packing slip, etc
⚠️ Important: You can only have one Carrier record per unique carrier and service combination. Attempting to create duplicate Carrier records with the same carrier and service option will result in an error.
Need multiple accounts with the same parcel carrier?
If you have more than one account with the same carrier (like UPS or FedEx), you'll need to create separate Parcel Accounts or Third Party Parcel Accounts in Infoplus. Each Parcel Account/Third Party Parcel Account represents a single shipping account with a specific carrier.
Key Differences:
- Infoplus "Carrier": Represents the combination of a specific shipping company (e.g., UPS, FedEx) and a specific parcel service offered by that company.
- Infoplus "Parcel Account": Represents your specific account with a carrier, including your account number and Manifest Partner details (EasyPost, eHub, etc).
You can find detailed instructions on creating Parcel Accounts/Third Party Parcel Accounts in our knowledge base article: Create a Parcel Account.
- Click the Create New button. The Creating New Carrier screen appears:
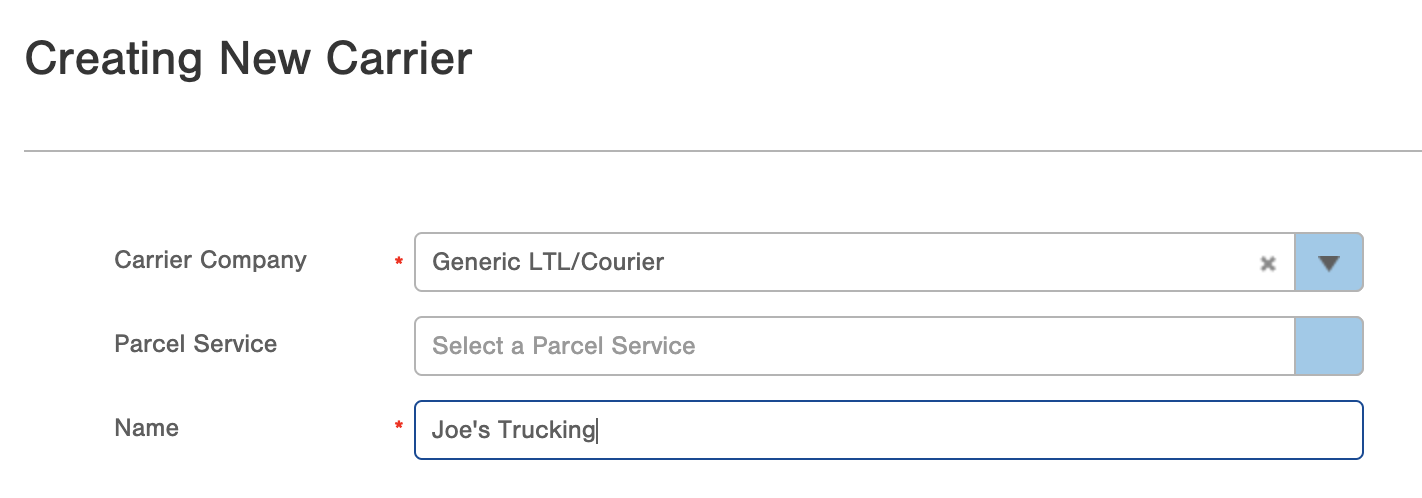
- In the Carrier Company field, choose Generic LTL/Courier.
- Note that the Parcel Service field will be disabled when creating a non-parcel carrier, so you can skip this field.
- Enter the Name for the carrier that you would like to see throughout Infoplus when working with this carrier, for example when creating an order, or printing a Packing Slip.
- Click Save. The Carrier is saved and displays in the table.
Edit (Rename) a Carrier
- From the carrier table, find the carrier you wish to edit. Click the Edit option in the Actions menu. The Editing Carrier screen appears:
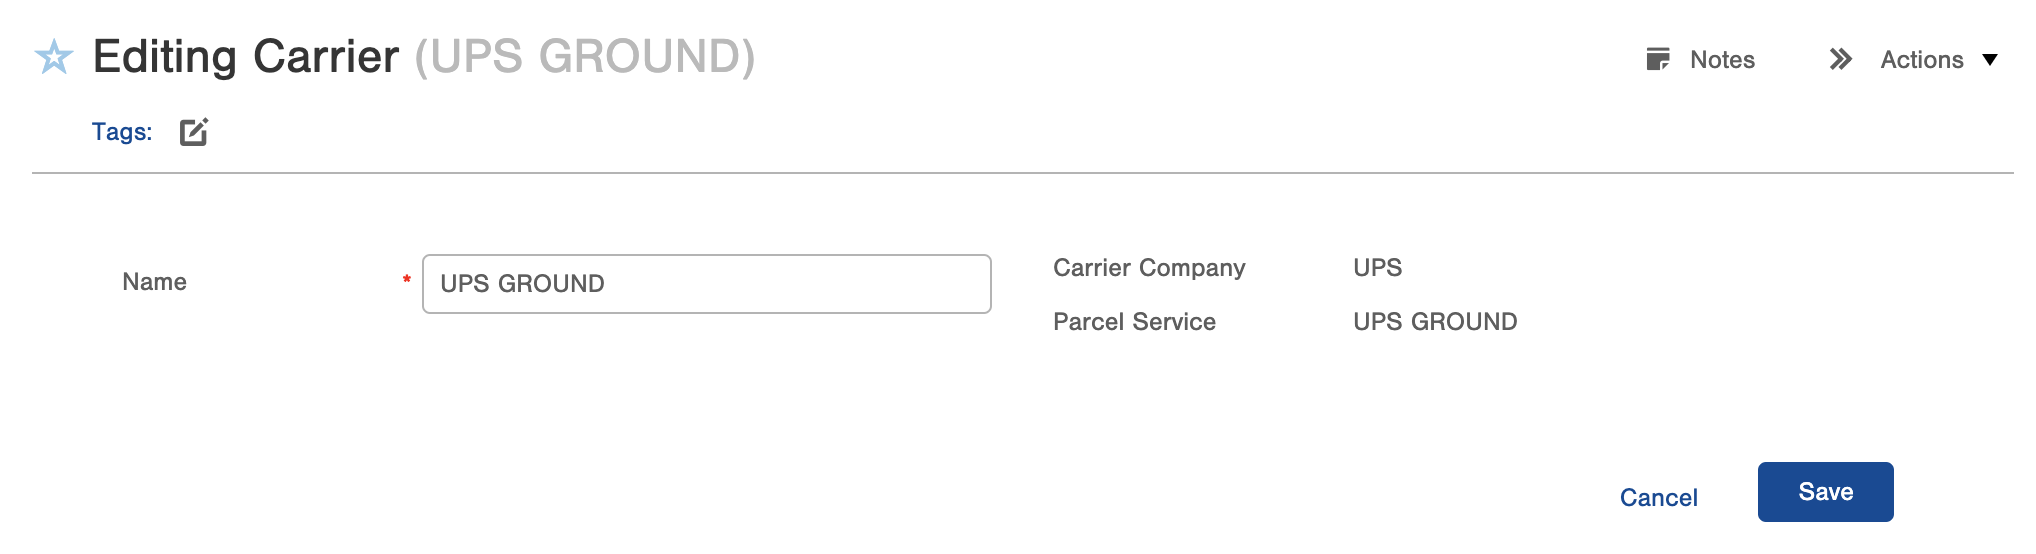
- You can change the carrier's Name on this screen, which is how it will appear throughout your Infoplus site.
- Click the Save button to make your change take effect.
Delete a Carrier
When you delete a Carrier record in Infoplus, it will no longer be available for use in new orders or shipments. However, it will still appear on existing orders and shipments for historical reference.
Essentially, deleting a Carrier removes it as an option for future use but doesn't erase its history from past orders.
- From the carrier table, find the carrier you wish to delete. Click the Delete option in the Actions menu.
- You will be prompted to confirm that you wish to delete the carrier. If you choose OK, the carrier will be deleted, and will no longer be offered as an option in the Carrier dropdown menus throughout Infoplus.
- Alternatively, from the Carrier table, you can check the boxes next to multiple carriers, and use Actions > Bulk Delete to remove multiple carriers at the same time.