In addition to using Quick Receipts and Receiving Worksheets, you can additionally use Interactive Receiving to receive items into your warehouse. Interactive Receiving offers the most options for customization and quality control compared to Quick Receipts and Receiving Worksheets. The steps below outline the configuration and steps required to use this app.
Before you can use Interactive Receiving, configure the Receiving Criteria Scheme with what should be recorded during receiving. You can create as many Receiving Criteria Schemes as you need and then they are added to your Items in Infoplus.
- Navigate to Warehouse Operations-->Receiving Setup-->Receiving Criteria Scheme
- Give the Receiving Criteria Scheme a name.
- Note: You will want to make it unique if you have multiple schemes.
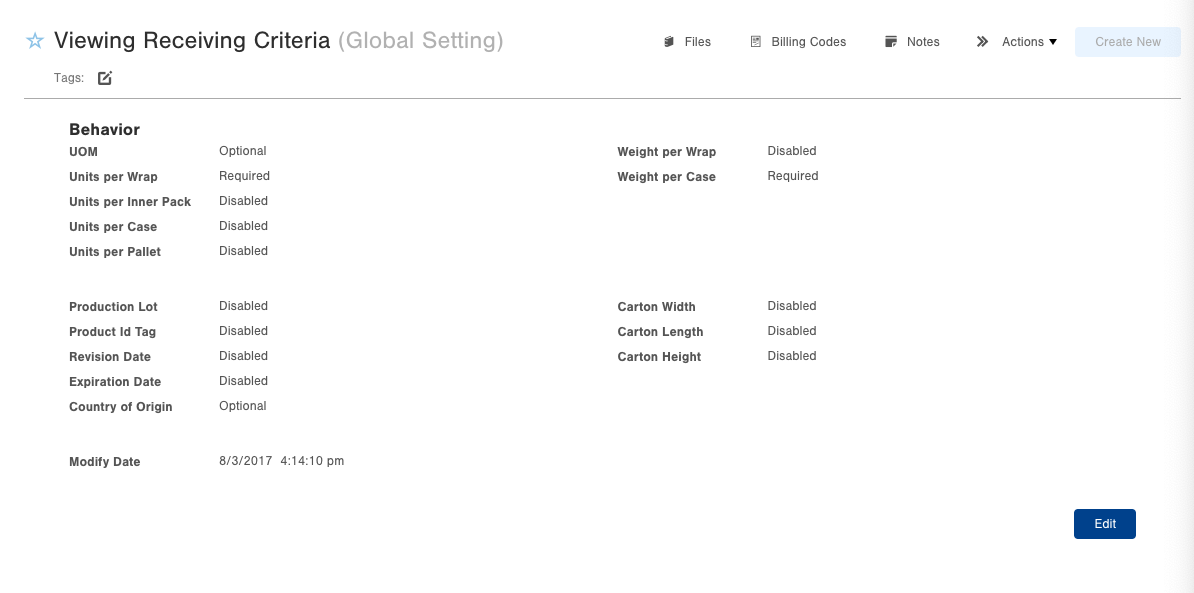
- Read through each option, and decide what behavior you would like to have during Interactive Receiving (Required, Optional or Disabled)
- Note: Even if you don't want to record a field, it must have Disabled entered in the Receiving Criteria Scheme.
- Here are all the possible fields that can be recorded using this app:
- Save the Receiving Criteria Scheme.
- Now navigate to the Item table.
- You can add the schemes one-by-one or select a range of Items you want to add the Receiving Criteria Schemes to and Bulk Edit them.
- Note: All Items must have a Receiving Criteria Scheme assigned to them.
- Once in Bulk Edit mode, navigate to the Operations tab and select the Receiving Criteria Scheme field. Then select which scheme you want to add to the Items and hit save once done.
To Use Interactive Receiving:
- Access the Receiving Warehouse App. There are two ways, depending on whether you are using a computer/laptop or a mobile unit:
From a computer/laptop:
Navigate to Ops Apps (beta) by clicking and opening the breadcrumb on the top left of the Infoplus desktop view.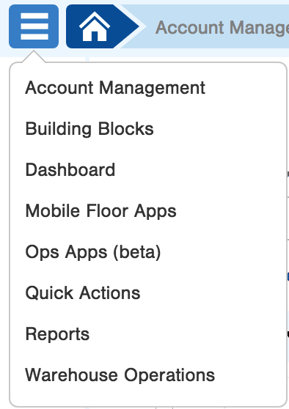
- Click Inventory.
- Click Receiving.
From a mobile unit:
- Tap Inventory.
- Tap Receiving. - Select a Warehouse that you would like to receive items into.
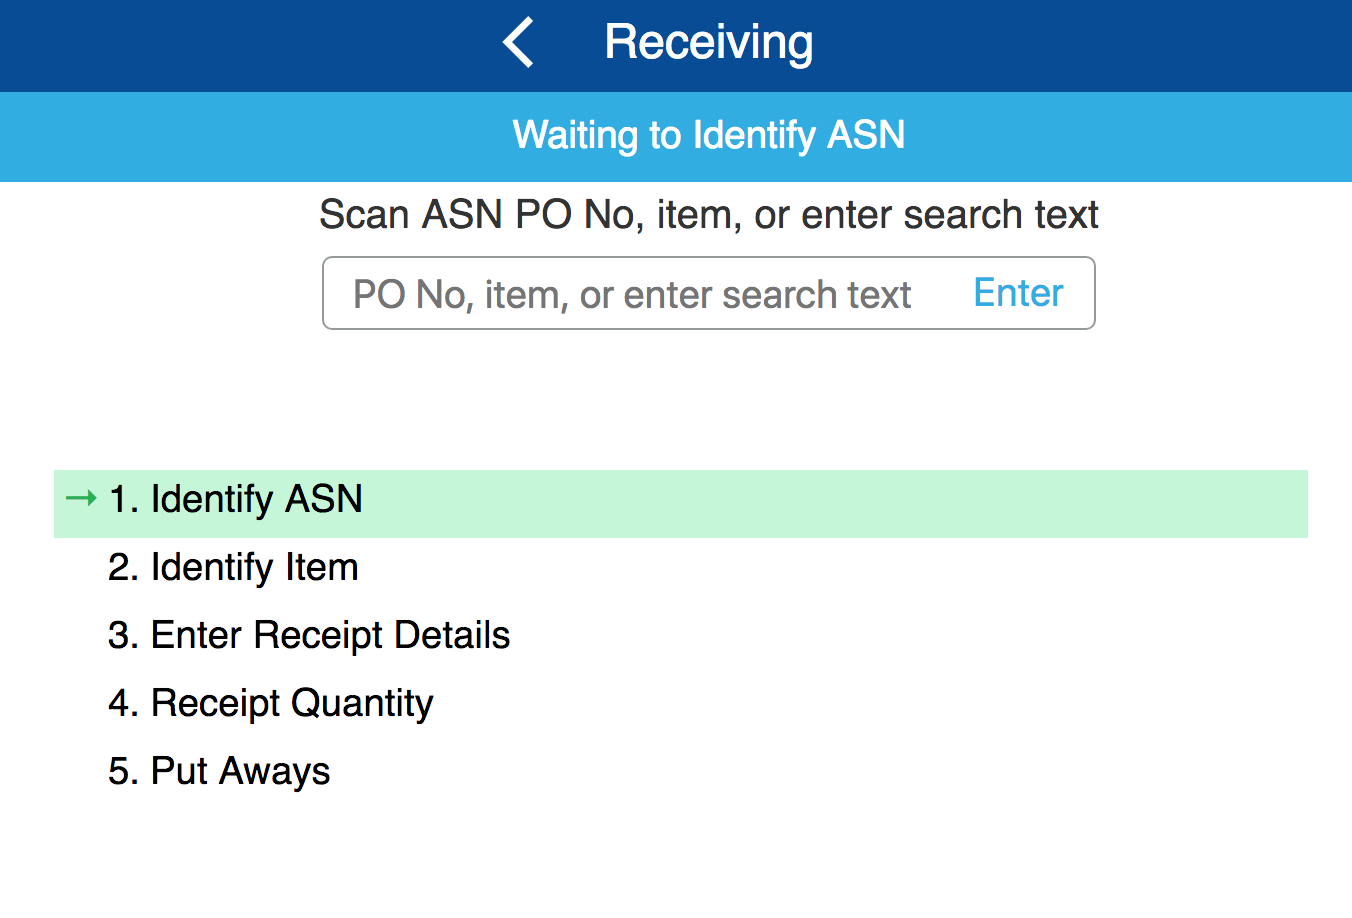
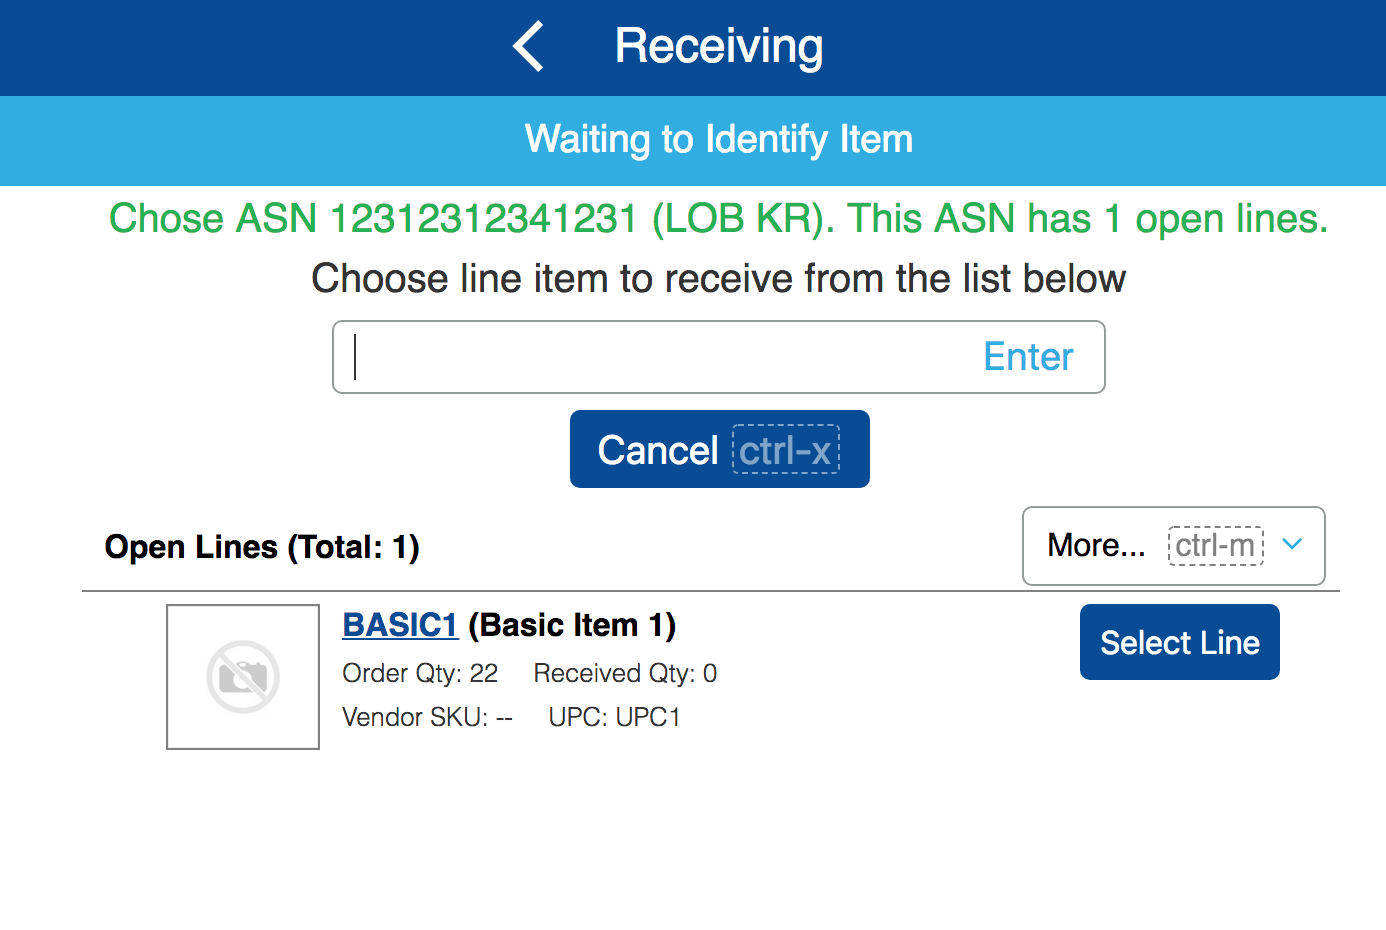
- Scan the ASN PO No, item, or enter search text. Note: you are able to receive without an ASN (Blind Receiving) see this article on how.
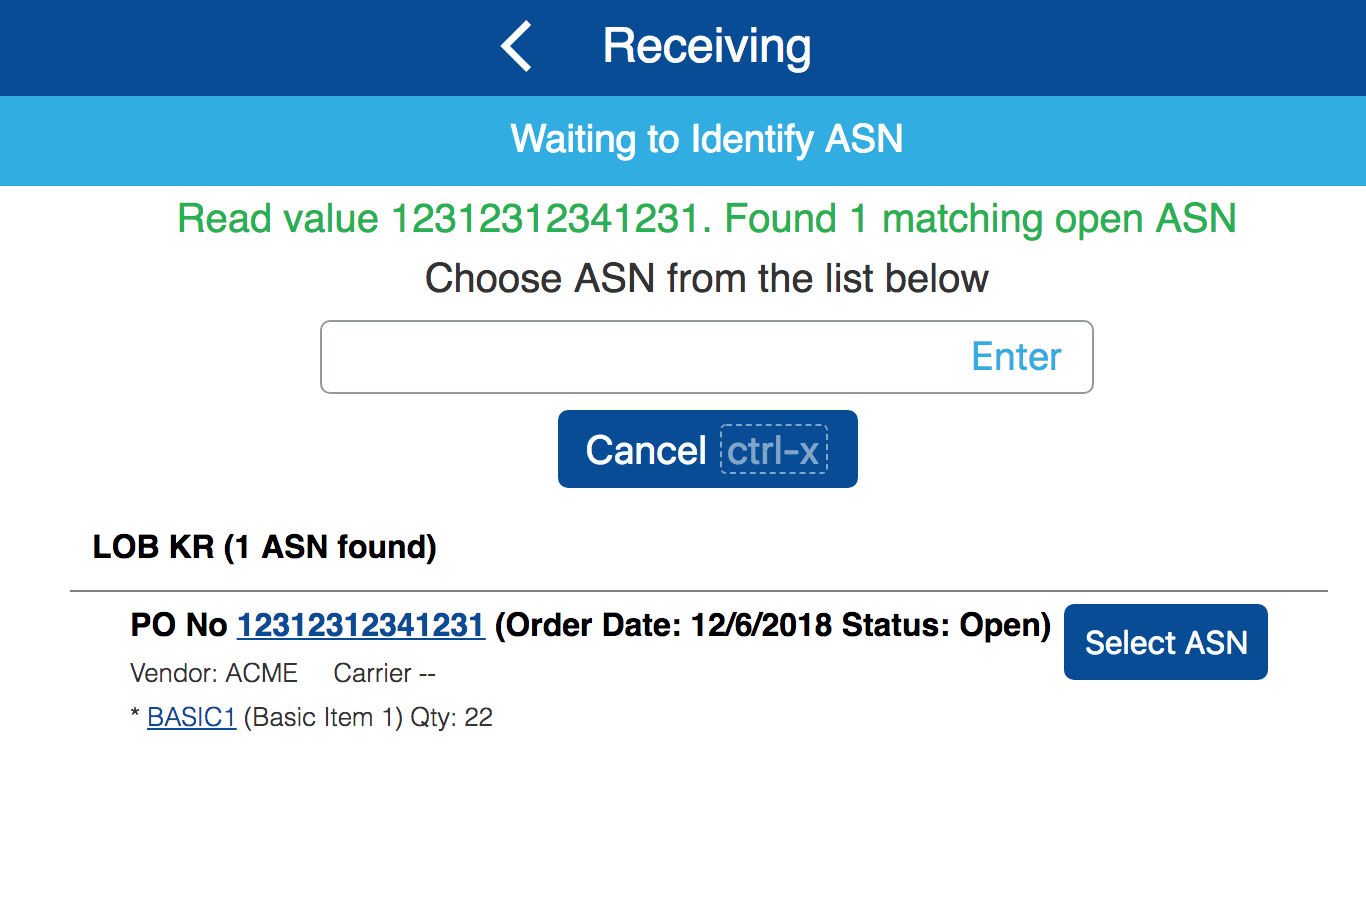
- After typing in the ASN PO no or item, select the correct ASN for the search list.
- Next, select the line item from the list below. Note: if you have a UOM barcode setup on the Item, you can scan the UOM barcode to identify whether you are receiving by Case, Pallet, or Inner Pack.
- After you've selected the appropriate item, enter all necessary information about this item as previously defined in the Receiving Criteria Scheme. In this example, the following fields must be inputted at the time of receiving each item. This will change based on how the Receiving Criteria Scheme is configured.
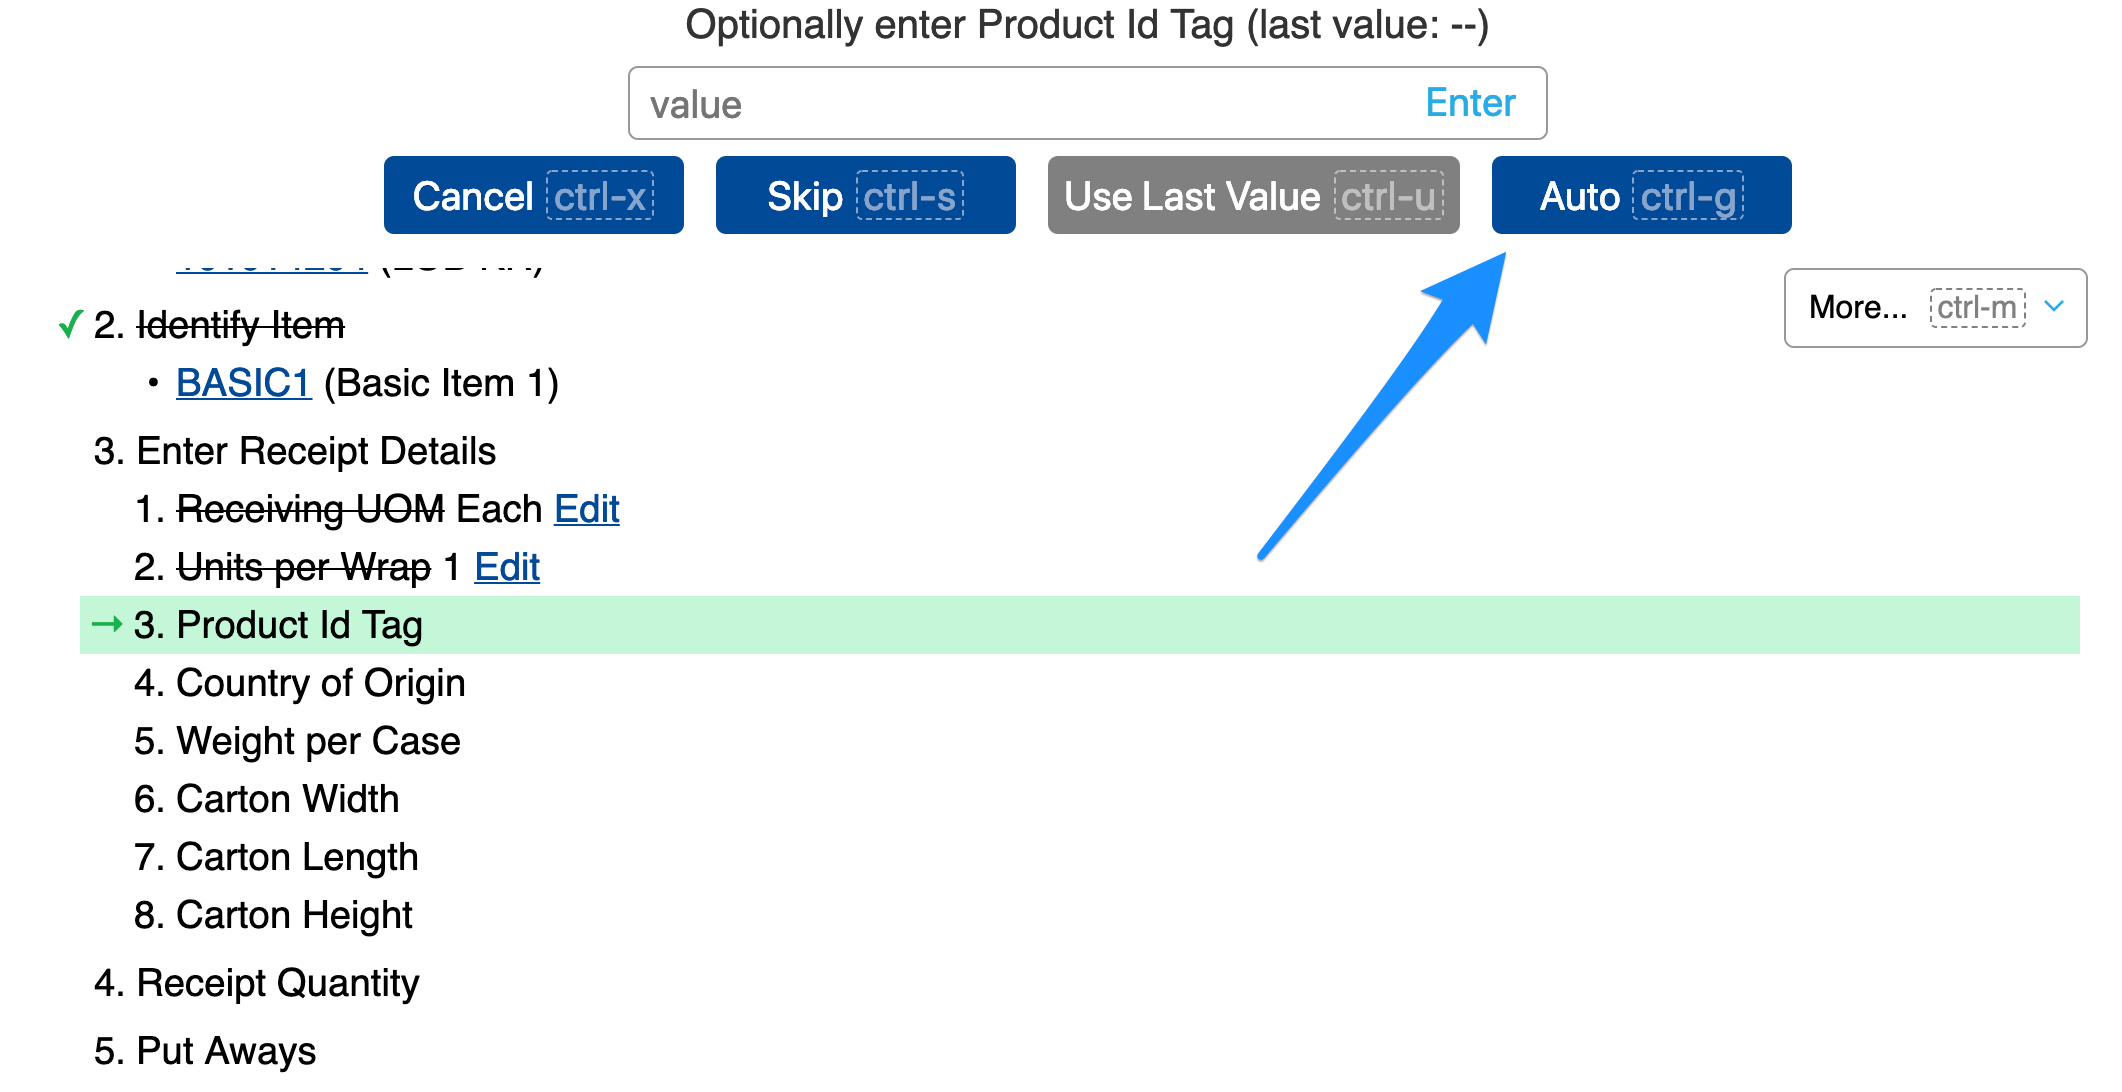
Note: If you are recording Product ID Tag (PIT) during receiving, you have the ability to Autogenerate a number when you are in the Interactive Receiving App:
Next, depending on how the item's Receiving Criteria is configured, record values such as:
- Units per Wrap

For speed and convenience, click or tap the Use Last Value option. This option will allow you to automatically populate the value that was used the previous time this item was received. In this example, the last time BASIC1 was received it had a Units per Wrap of 1, and so does our current receipt, so we can use the Use Last Value button. - Country of Origin
- Weight per Case
- Total Quantity being received. You can choose to put all away in a single Location or choose to put a portion and then put the rest in another location.
- Scan location for the put away, making sure the location has physical space available and is properly configured to store the item.
After receiving the first line on an ASN, optionally receive other lines if needed, or move on to a different ASN.
Use Case Examples
Use Case:
I am putting away my product and I come across a location without a label. Can I print a label on the fly for the inventory?
Solution:
Yes, on the Receiving screen, after inputting the Receipt Details, you can click the 'More' dropdown and click 'Print Barcode' to print out a new inventory barcode.
