When you need to adjust inventory in your warehouse (e.g., due to damaged merchandise, customer audit, etc.), use the Inventory Adjustment Warehouse App. You can identify the inventory to be adjusted by location, SKU, or Product ID Tag (if used).
See this article on how to create, edit, or delete Adjustment Codes.
NOTE: The Inventory Adjustment Warehouse App is most often used when the adjustment is being made while on the warehouse floor, but you can also perform a Quick Adjustment using the Desktop App.
Adjust Inventory
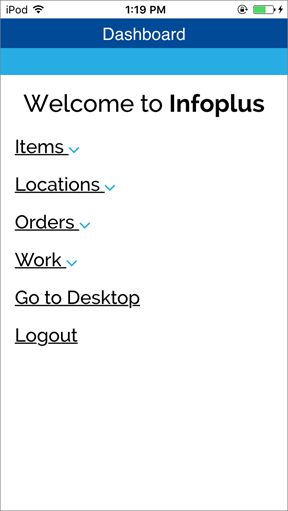
- On a mobile device, log into the Infoplus App. The Infoplus Dashboard appears.
-
Select the Work App.
-
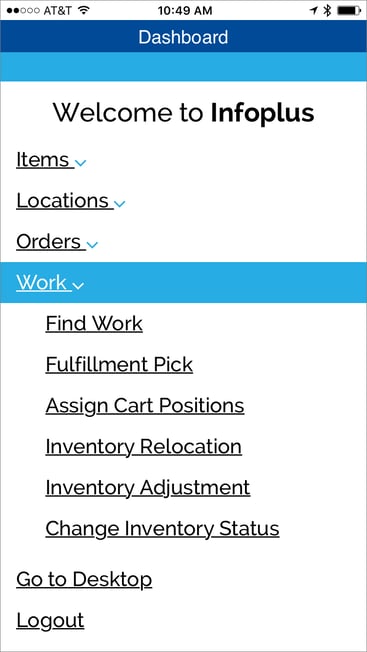
From the Work drop-down menu, select Inventory Adjustment.
-
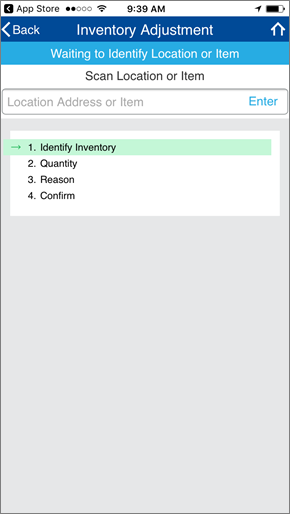
Enter or Scan the Location, SKU, or Product ID Tag (if used) to identify the Item that needs to be adjusted. If typing the information, tap Enter.
-
If the SKU only lives in one location, you will be prompted for the new quantity. Continue to the next step.
-
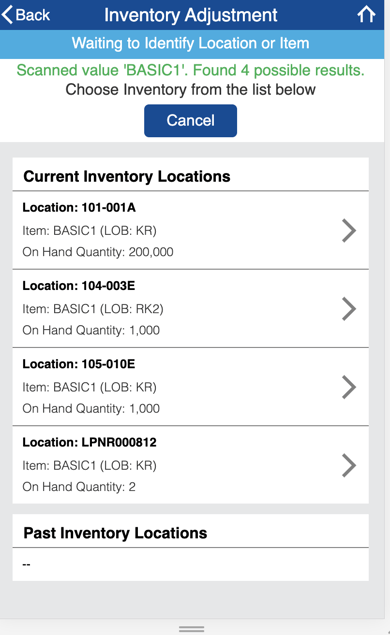
If the SKU lives in more than one location, you will be prompted to select the location for the adjustment (as shown in the screenshot below).
-
If If you entered a location that contains multiple SKUs, you will be prompted to select the item for adjustment.
-
If the SKU has Past Inventory Locations (meaning locations where it previously resided but no longer does), each will be listed. You can choose to adjust inventory back into a past location as long as a different item hasn't been placed there that doesn't allow for item/lot mixing.
NOTE: "Past Inventory Locations" only includes locations the SKU lived in for the last 30 days.
-
-
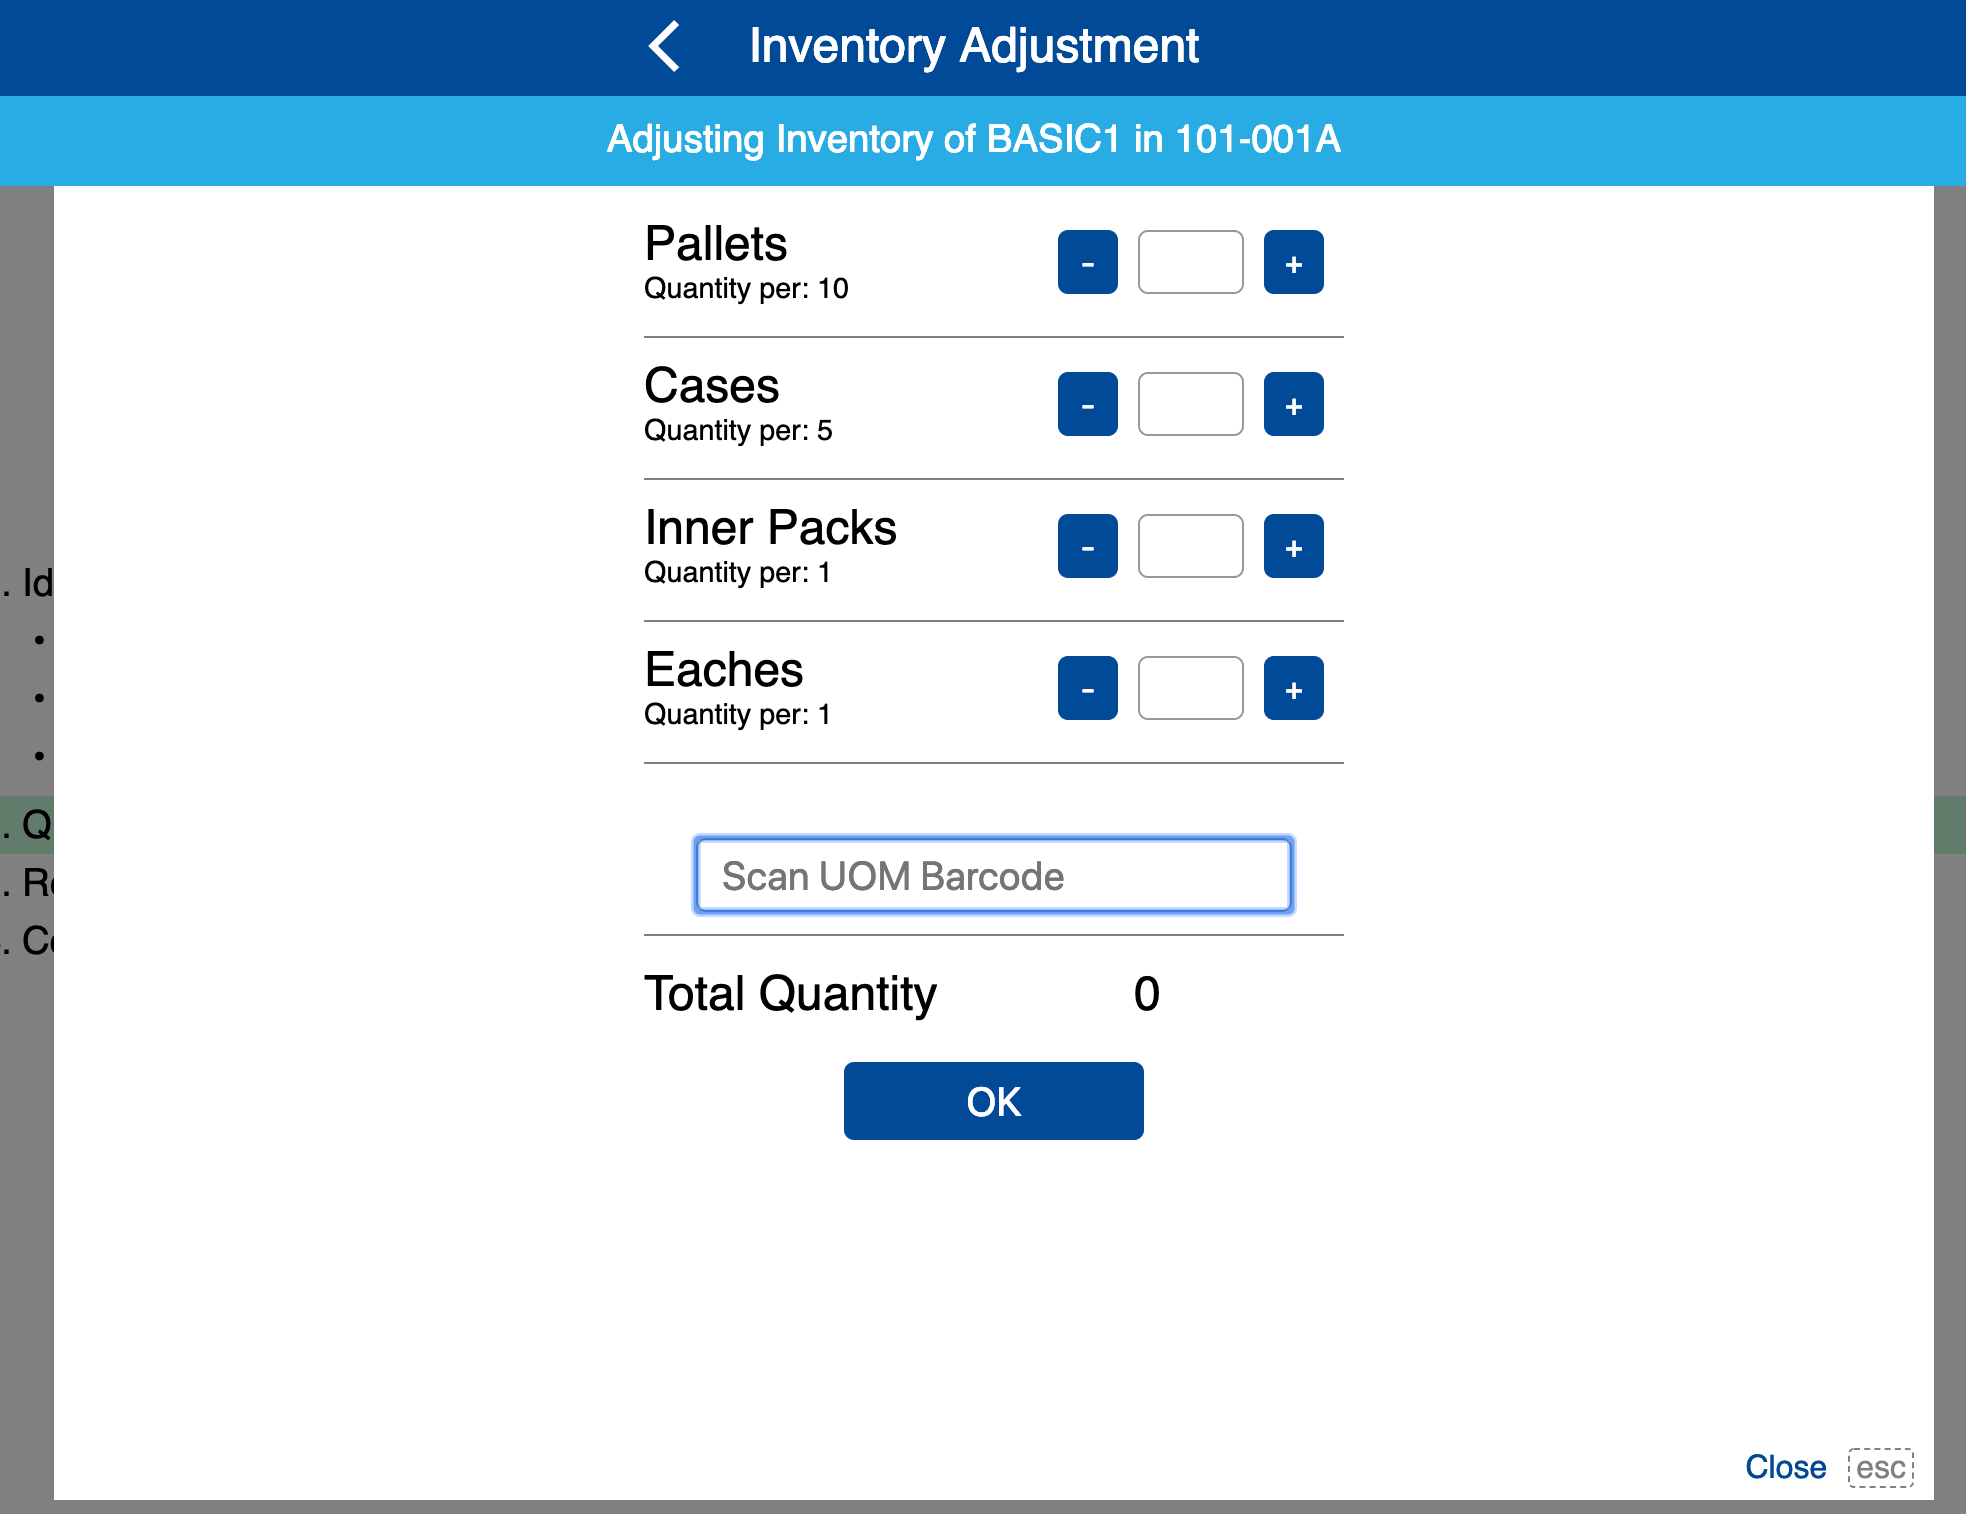
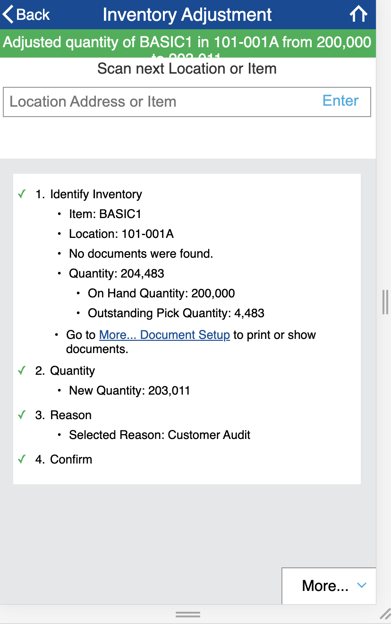
After the location and item have been identified, enter the correct Quantity for the item and location (e.g., if there were 5000 items in the location and 100 were damaged, type 4900).
-
If you have a UOM setup at the Item level, you can select the UOM button, and then you can adjust via Case, Pallet, Inner Pack, and Eaches quantities. Also, if you have UOM barcodes set on the Item level you can scan the correlating barcode to make the adjustment:
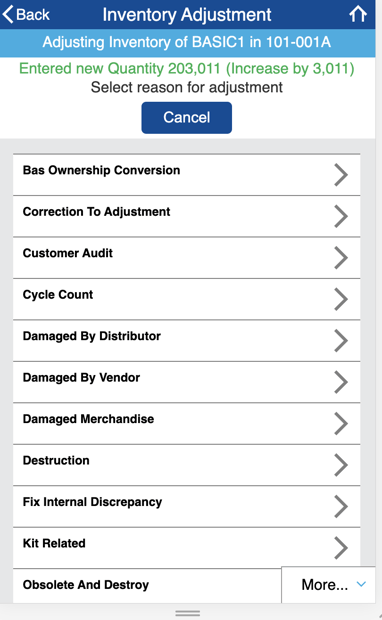
- Next, You will be prompted for the reason for the adjustment. To add custom adjustment reasons to the list, please contact Infoplus Support.
- A Confirmation screen will appear:
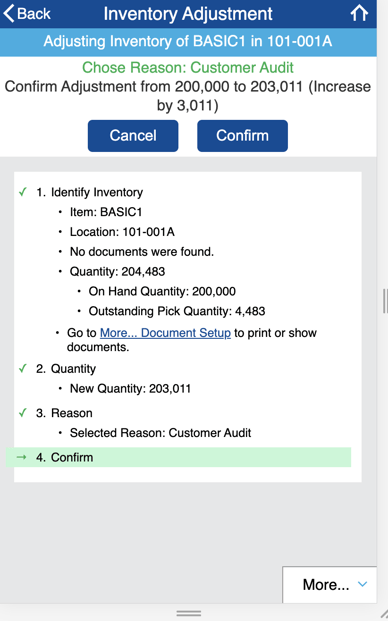
- Review the planned adjustment, and then tap Confirm. The adjustment is complete:
Note:
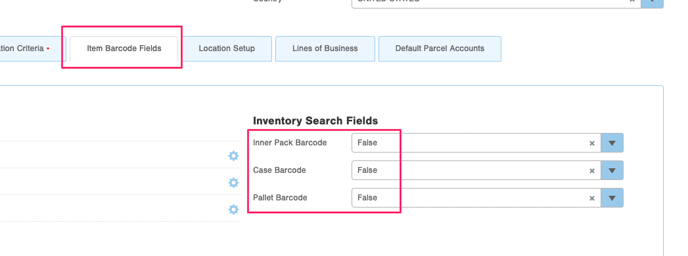
By default, the Mobile Floor App does not search the Inner Pack Barcode field, the Case Barcode field, or the Pallet Barcode field. If you would like to use these to search inventory for adjustments, enable them by going to the Warehouse table and then the Item Barcode Fields tab like so: