In Infoplus, Lines of Business are the most basic unit for segregating data and activity. For example, all Items, Orders, ASNs, Inventory, and Customers (among several other data types) are assigned to a single Line of Business in Infoplus. When creating an Order, the Customer and all Items on the Order must come from the same Line of Business.
For example, if you are 3PL, each of your clients would correspond to a Line of Business in Infoplus. You may even have some clients for whom you handle multiple unrelated business units, in which case you could treat these as a unique Line of Business.
If you are a Retailer, you might only need to use a single Line of Business in Infoplus. However, if you have multiple business units, with non-overlapping data, you may treat these as separate Lines of Business as well (for example, a shoes unit and an office supplies unit - and you never receive orders that cross units).
Create a Line of Business
- Access the "Line of Business" table. There are two ways:
From the Dashboard: Click the “Apps” tab, click the “Account Setup” App, then click the “Line of Business” Table.
From the Quick Actions shortcut: Press a dot (period) on your keyboard, then select “Line of Business” from the list of Quick Actions. - Click the Create New button in the top right. The "Creating New Line of Business" screen appears.
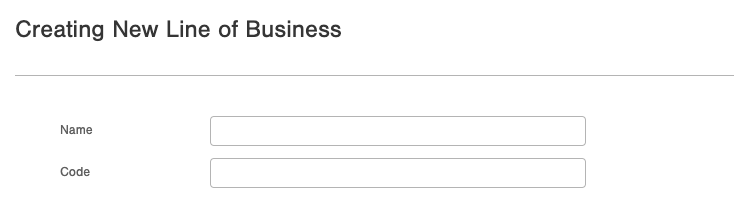
- Supply values in the fields:
- Name - this is your full name for the Line of Business. For example, for a 3PL, this is your client's name, or for a Retailer, this would be the name of a business unit.
- Code - this is the way the Line of Business will be identified in most places throughout Infoplus. You can use the name if you choose, but it can be helpful to use an abbreviated version of the name.
- When finished enter values, click Save. The new Line of Business is saved.
- When a new Line of Business is saved, initially it will be associated with the following user Roles: Administrator, Warehouse Operations, Account Services, and User.
- If your user account is not associated with one of the roles listed above, you will not have access or visibility to the new Line of Business.
- You may need to edit what users and roles have access to the new line of business. See Overview of Users and Roles for details.
Edit a Line of Business
After you have initially created and saved a line of business, if you return to edit it, you will see additional fields you can edit. These fields are:
- Name and Code, the same as they are on the Create screen.
- Service Defaults
a. For orders in this Line of Business, these fields control the default Warehouse Service Type assigned to new orders.
b. In addition, you can define for this Line of Business, how your SLA (Service Level Agreement) Dates are assigned. If you are using the Infoplus Insights module, these settings, plus the SLA Rules, help you identify when your orders are due for shipping. - Account Status
If you need to suspend activity in a Line of Business, you can set the On Hold field to True, and optionally include an On Hold Reason (such as, "Behind on Payments"). When a Line of Business is On Hold, orders for the Line of Business cannot be Fulfilled. - Item Receipt Defaults: Setting these values will allow receiving inventory Under or Over the expected amount ordered on the ASN.
a. Max Under: If the ASN is expecting to receive 100 units to complete the PO, and the Max Under is set to 10%, the ASN will close if a value between 90 and 100 is received. The recommended value for this setting is 0% (No Shortages)
b. Max Over: Allows the ASN to receive a percentage (%) of inventory above the stated amount on the ASN. This can help automatically close an ASN if a manufacturer changes case or pallet quantities and a slight overage is received due to the UOM change. The recommended value for this setting is 100% (Up to 100% more Overage)
Once the Line of Business is Created
You can use this article as a guide to set up your LOB now that is it created.
