Quick Receipts Series: Part 2
Prerequisite for this Knowledge Base Article: The steps described in these KB entries will need to be completed before assigning Item Serial Numbers to Quick Receipts.
Item Serial Scheme See Note after “Create a New Item Serial Scheme”
There are 3 ways to complete this process:
Before attempting the steps below, the following information is required:
Open Quick Receipt
Serial Numbers for Items
Quick Receipt ID Number
LOB
SKU

Manually
Steps:
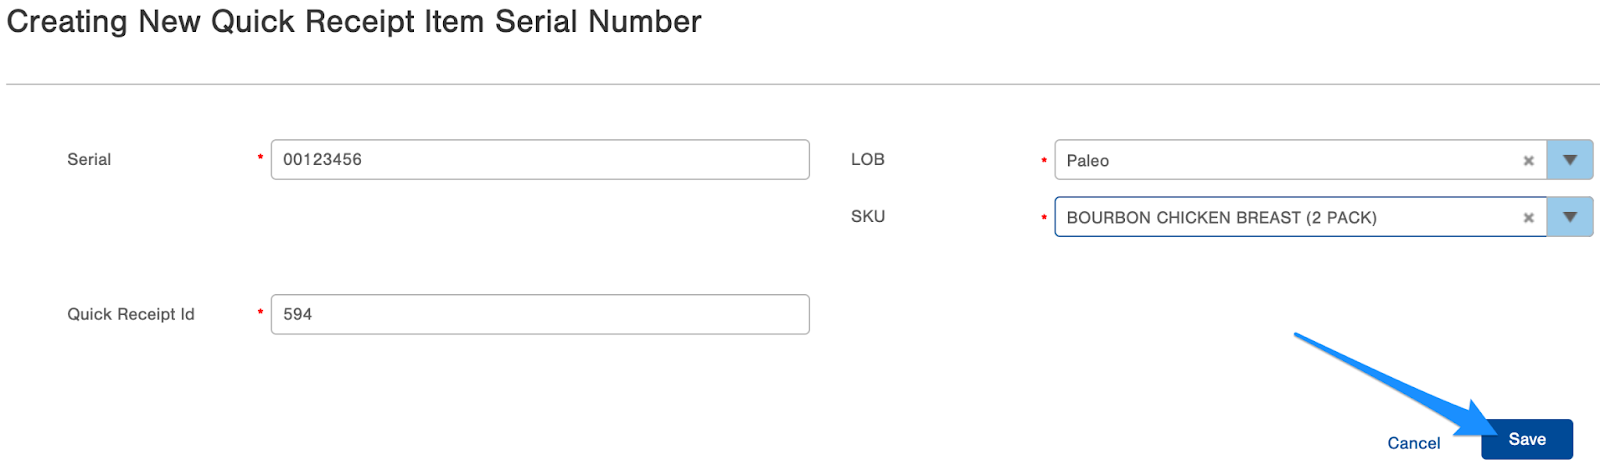
1. Within Infoplus, press the "." key to show the Quick Actions Tool. Type "Quick Receipt" in the blank. Find and click the "Quick Receipt Item Serial Number" option.On the page below, click the “Create New” button to the right.

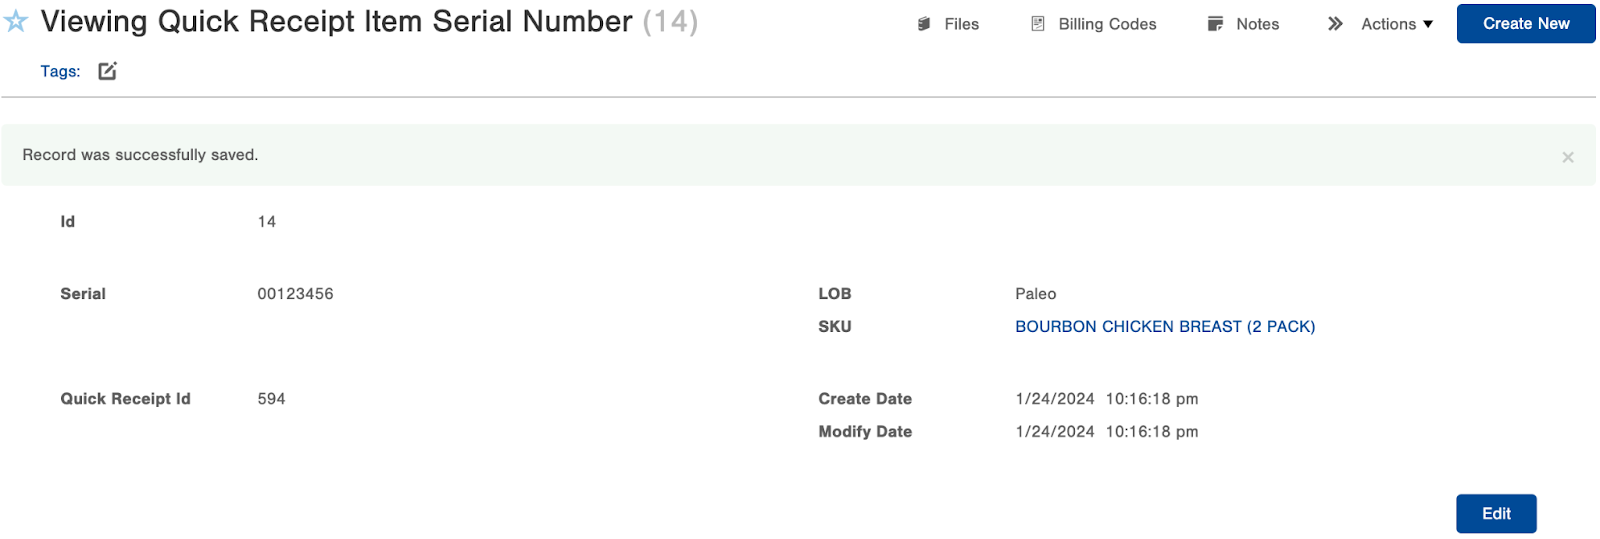
3. The following screen shows the correctly completed addition of the Serial Number to the Item.
Repeat steps 1 and 2 for the remaining Serial Numbers.
Pro Tip: For multiple Serial Numbers, use the Duplicate function under the “Actions” drop-down.

To complete the Quick Receipt process, see the Execute Quick Receipts link at the bottom of the page.
Bulk Load
Steps:
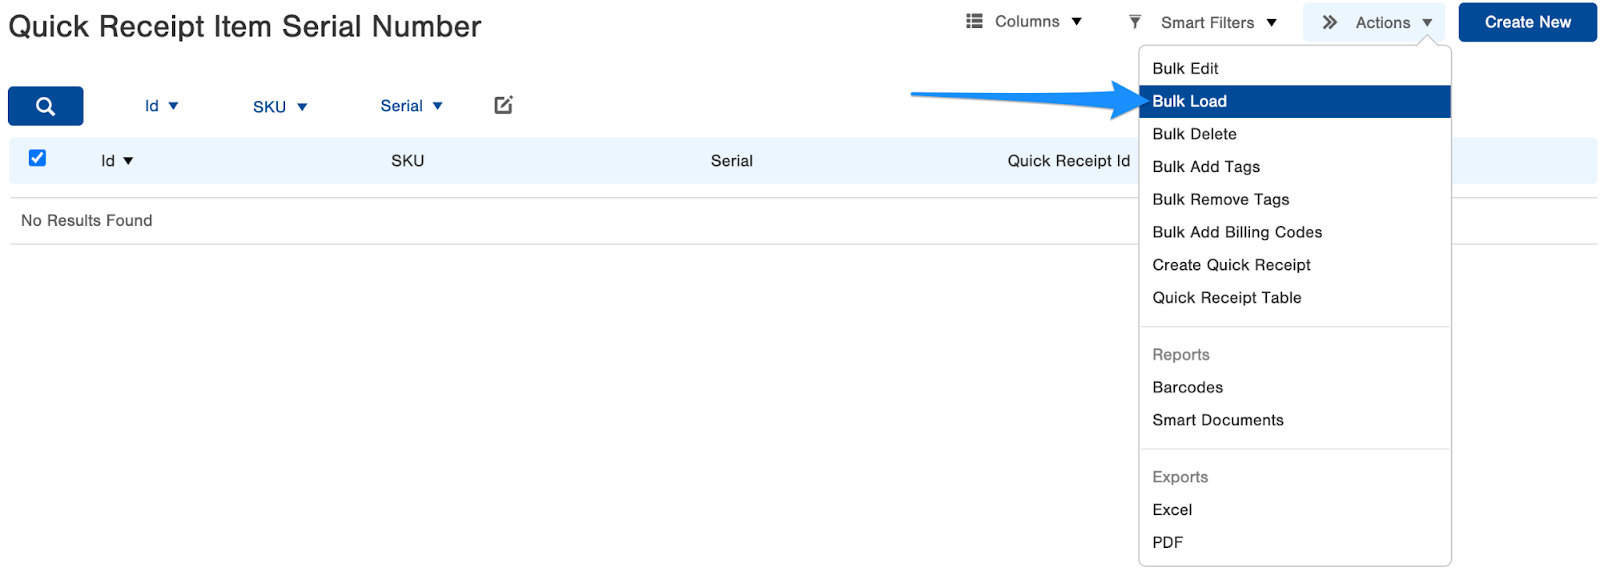
1. Within Infoplus, press the "." key to show the Quick Actions Tool. Type "Quick Receipt" in the blank. Click the "Quick Receipt Item Serial Number" option.On this page, click the “Action” drop-down, then select the Bulk Load option.
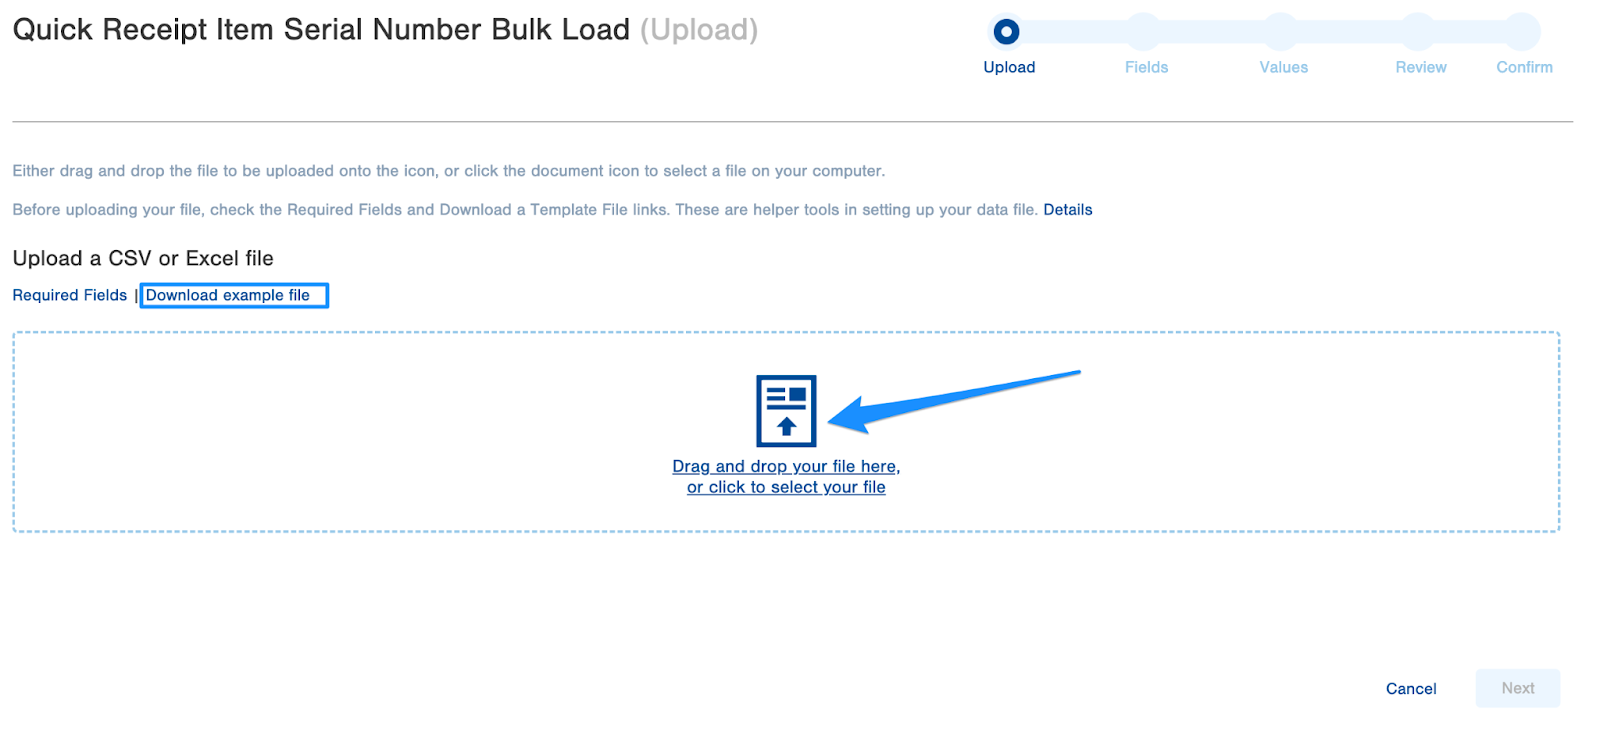
2. Create a .CSV file using Microsoft Excel, Google Sheets, or any other spreadsheet application. Configure the table as follows adding as many rows as Items being received: (Column Headers are required fields)
|
LOB |
Serial |
Receipt ID |
SKU |
|
Paleo |
12345678 |
594 |
BOURBON CHICKEN BREAST (2 PACK) |
|
Paleo |
12345679 |
594 |
BOURBON CHICKEN BREAST (2 PACK) |
Pro Tip: To the left of the Upload icon is an optional example file. Use this file for a pre-configured table. Remember to save the document as a .CSV file.

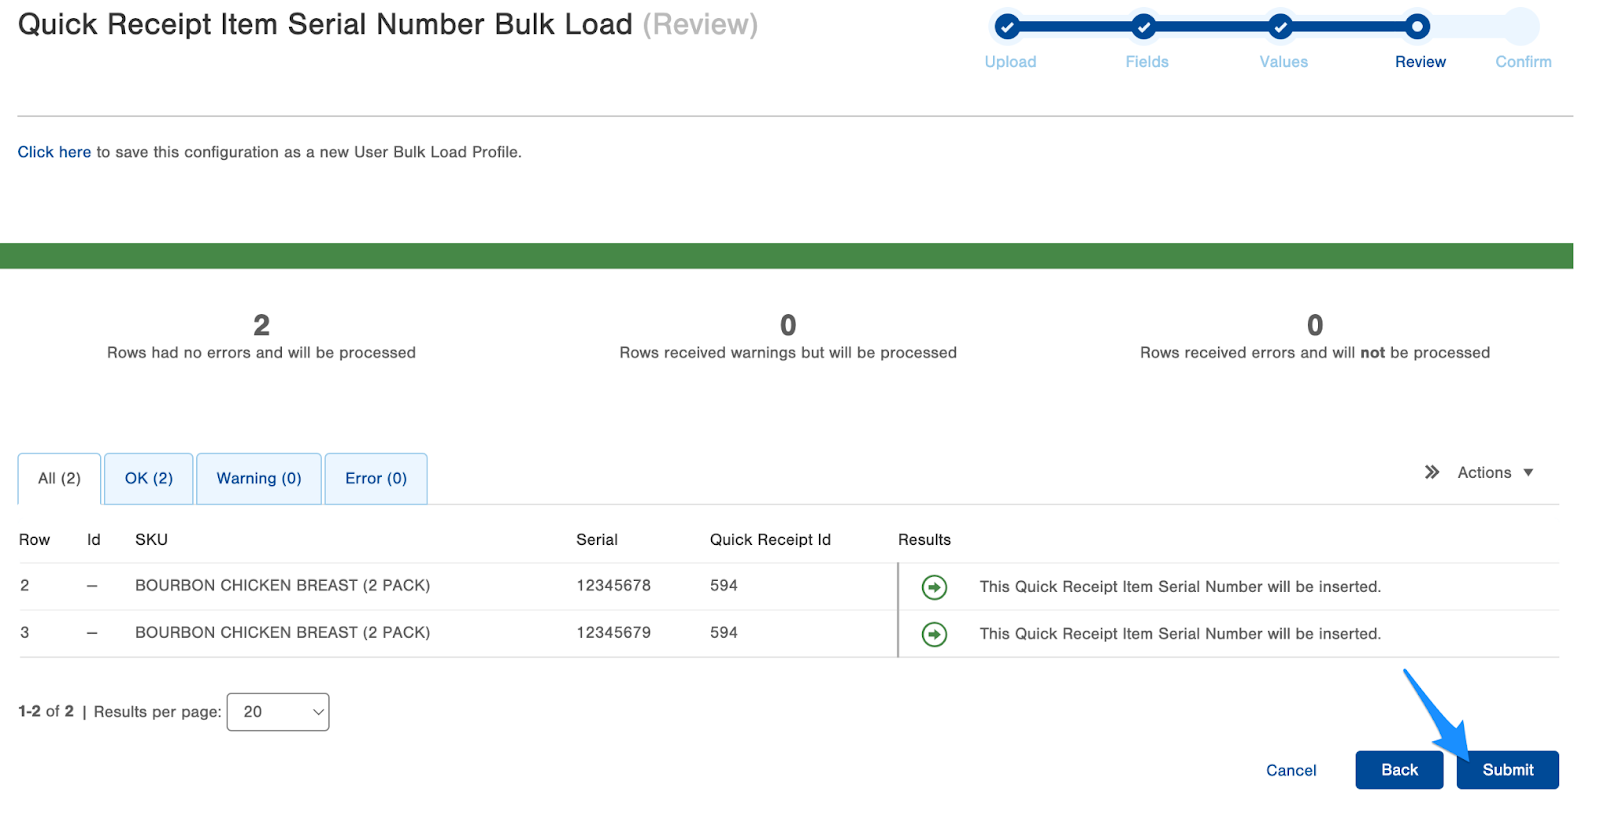
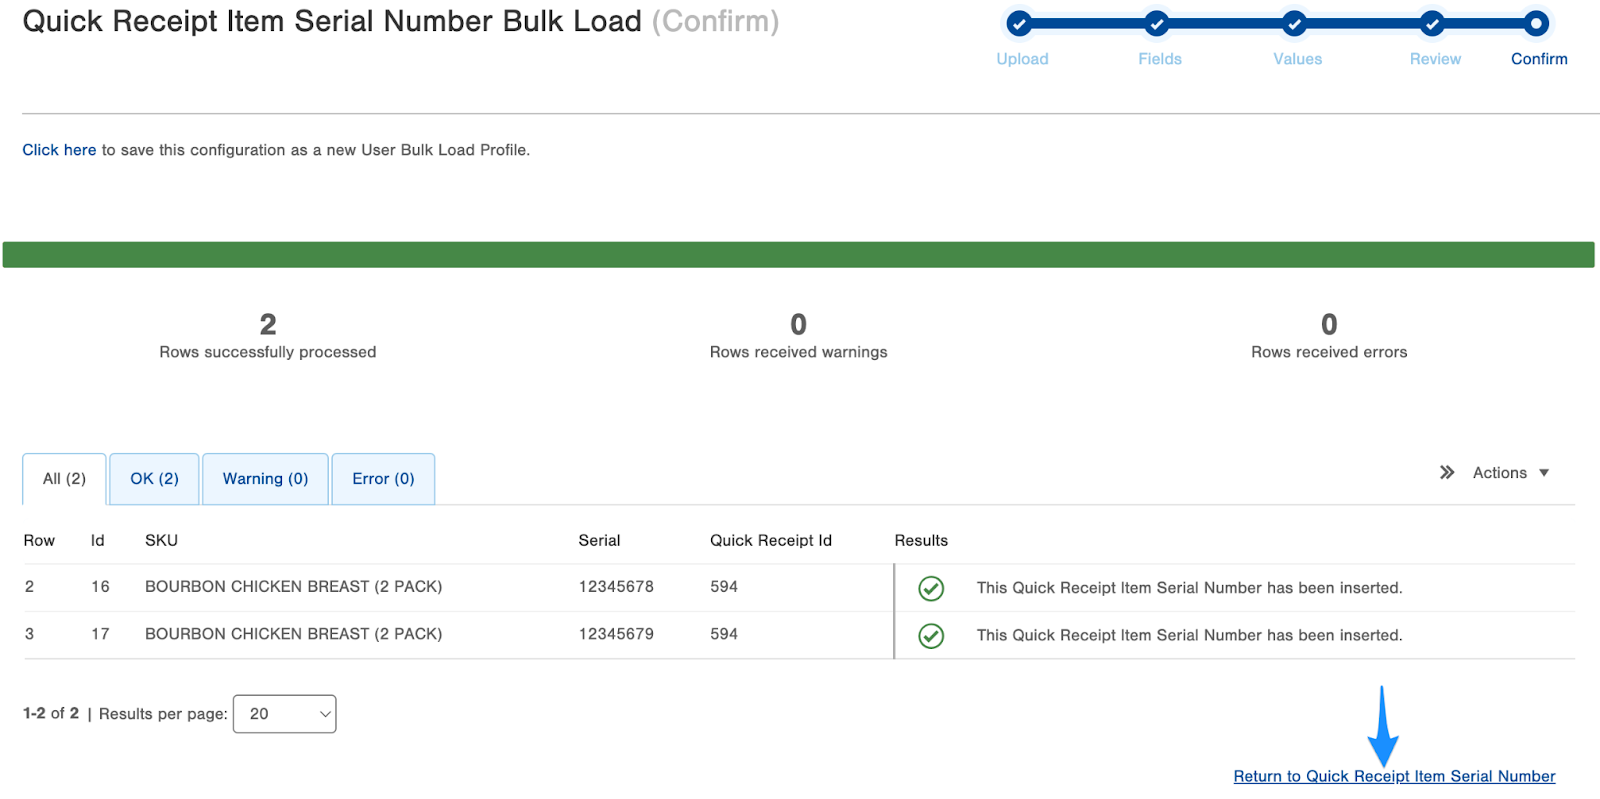
5. The next page shows the correctly processed Serial Numbers added to the Quick Receipt Items. If everything looks correct, Click the “Submit” button. However, If there are any errors, click the “Back” button and review the .CSV file for mistakes.

To complete the Quick Receipt process, see the Execute Quick Receipts link at the bottom of the page.
Via the Infoplus API
Special technical knowledge is required to perform the following process. Please review this Knowledge Base Article for an Overview of the Infoplus API.
Items in Infoplus may be created through the Infoplus API via a POST to the appropriate endpoint.
For example, the 3.0 API version, on the command line for Quick Receipt:
curl -s -H API-Key:YOUR-API-KEY -H Content-Type:application/json -X POST -d @quickReceipt.json \
https://YOUR-INFOPLUS-DOMAIN/infoplus-wms/api/v3.0/quickReceipt
The JSON for the simplest example of a quick receipt with item serial numbers is:
{
 “warehouseId”: 2363,
 “lobId”: “18350”,
 “locationId”: “2221”,
 “quantity”: “2”,
 “weightPerWrap”: “4”,
 “unitsPerWrap”: “1”,
 “sku”: “BOURBON CHICKEN BREAST (2 PACK)”,
 “itemSerials”: [
   “00123456713”,
   “00123456714"
 ]
}
Infoplus Support can help with general questions about how scripting works. For help with a specific script or its outputs, you will need to submit a Pro Services request for paid support. Pro Service request form can be found here.
To complete the Quick Receipt process, select the following link Execute Quick Receipts.